Surgeons/Restorative dentists:
Dr. Stefano Pucci – Florence, Italy
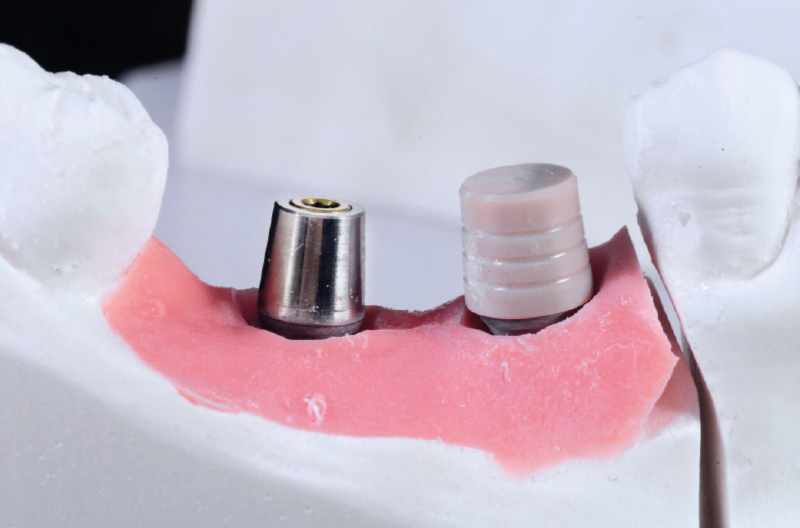
This case report illustrates the clinical and laboratory procedures for the restoration of two mandibular posterior Ø 4,1 mm Classix implants with a fixed bridge which uses conometric friction retention instead of screws or cement. The friction retention is obtained through titanium abutments (MUA-Conics) with a 5-degree (half angle) tapered top and preformed conometric caps, made of PEEK, with an internal connection with the same taper angle, that are fixed within the bridge.
XCN® conometric-retained bridges help to save time during check-ups: the bridge can be removed and repositioned in seconds. There are no screws which have to be unscrewed or can break, no screw access holes to open and to close. Passivity is always guaranteed as conometric caps are intraorally incorporated within the bridge. Once done, the bridge is taken out of the mouth and excess cement removed. The perfectly cleaned and polished bridge is replaced in the mouth reducing the risk of biological complications. Fixed conometric-retained prosthesis can also be fabricated in case of non-parallel implants thanks to straight and angled (7,5° – 15° – 25° – 35°) abutments in 4 different gingival heights with no limits on positioning (XCN® 360° connection).

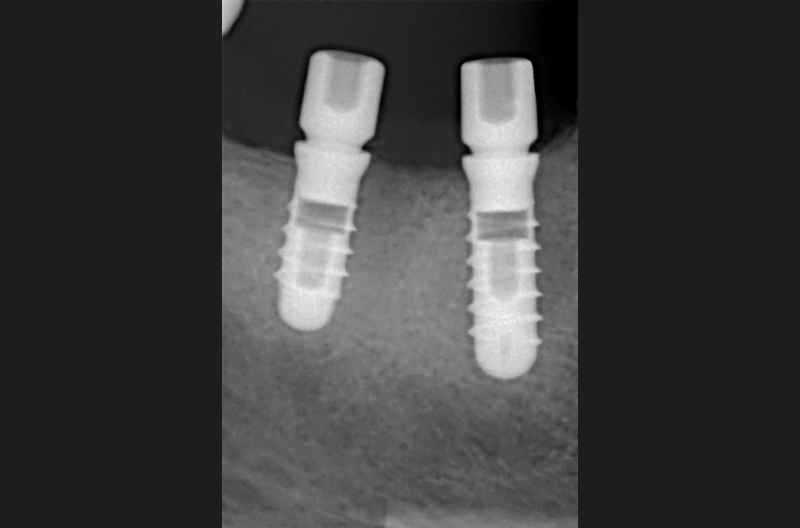
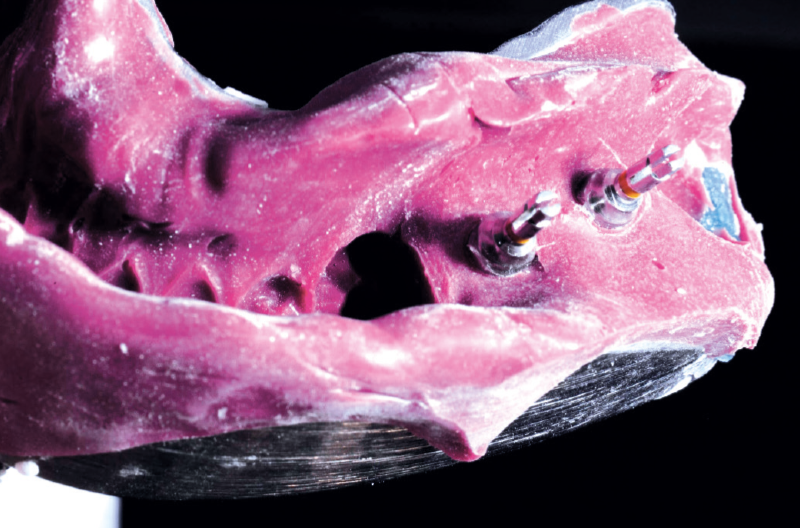
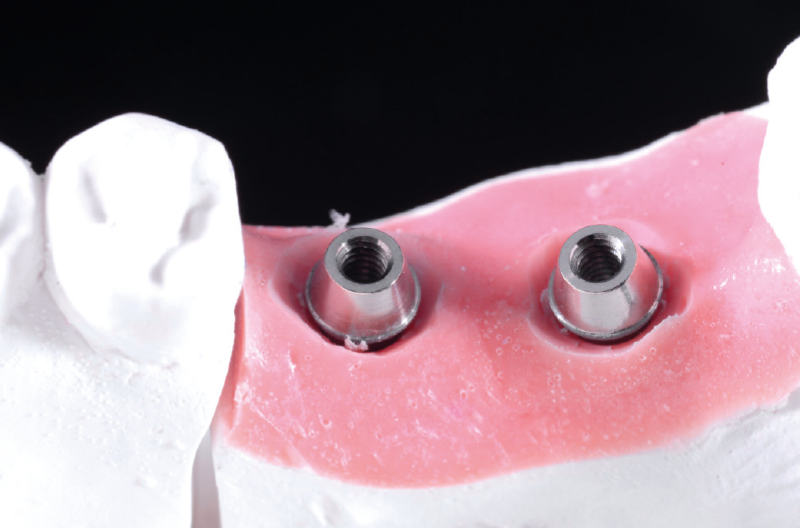
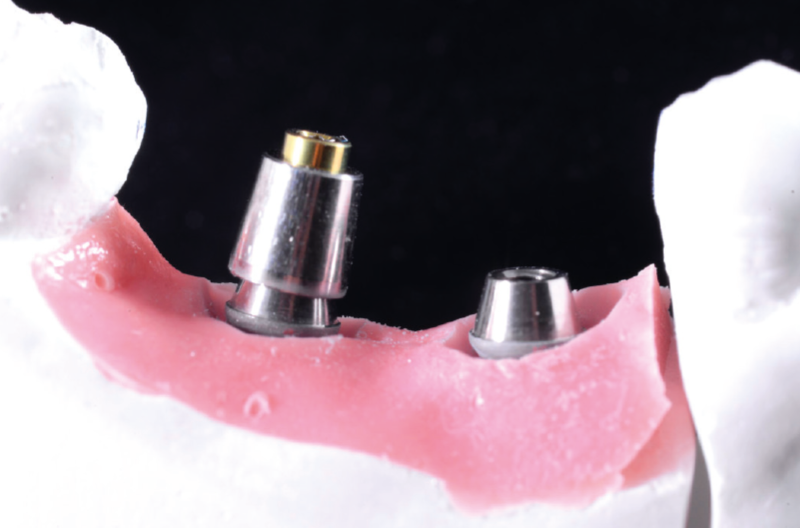
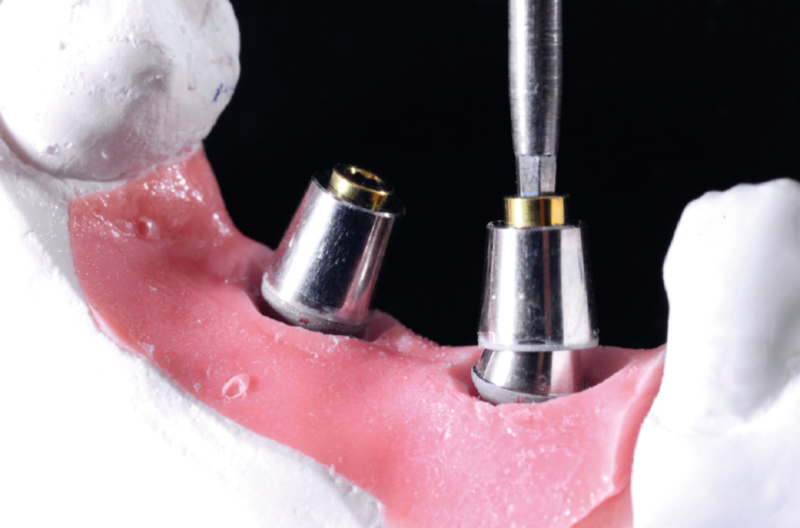
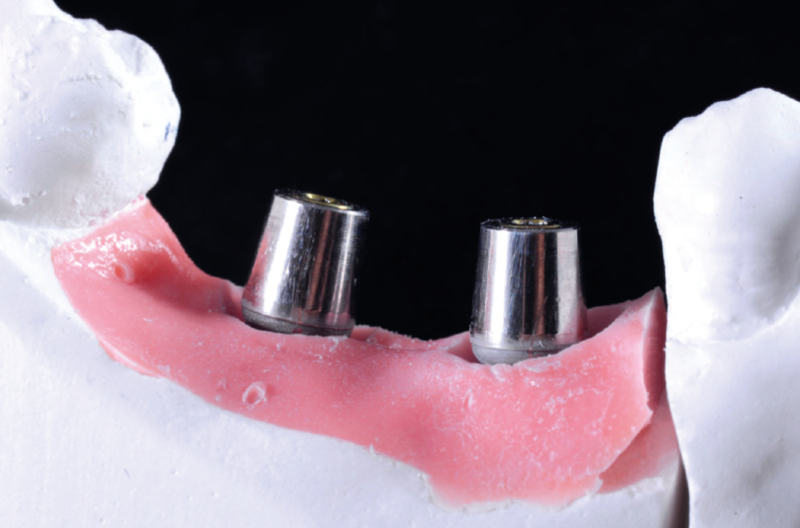
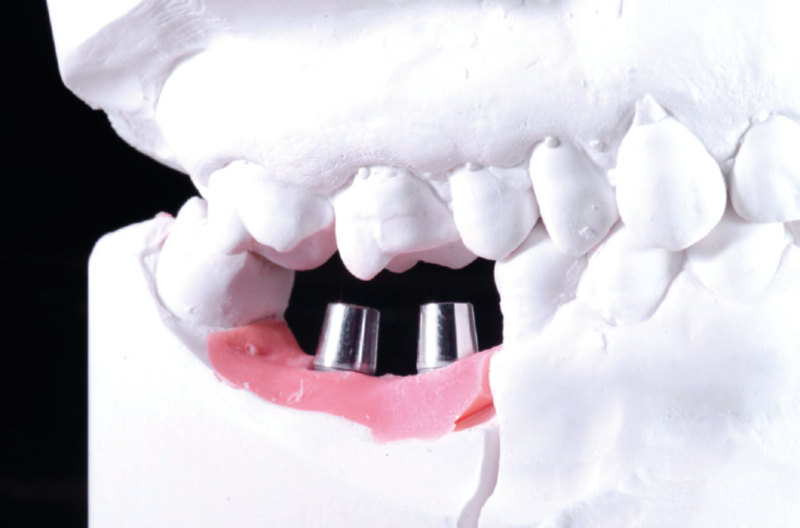
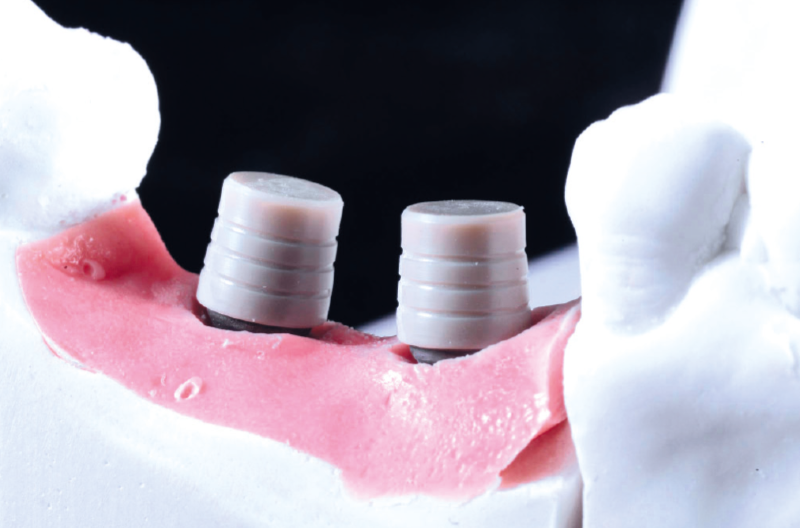
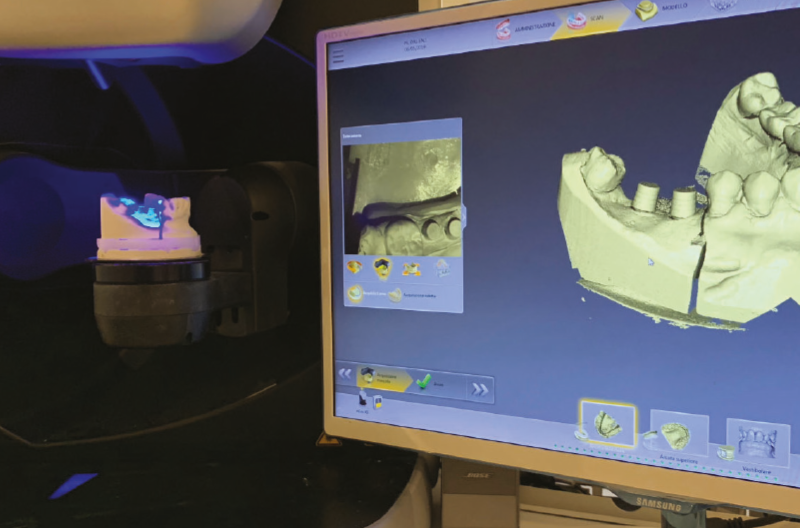
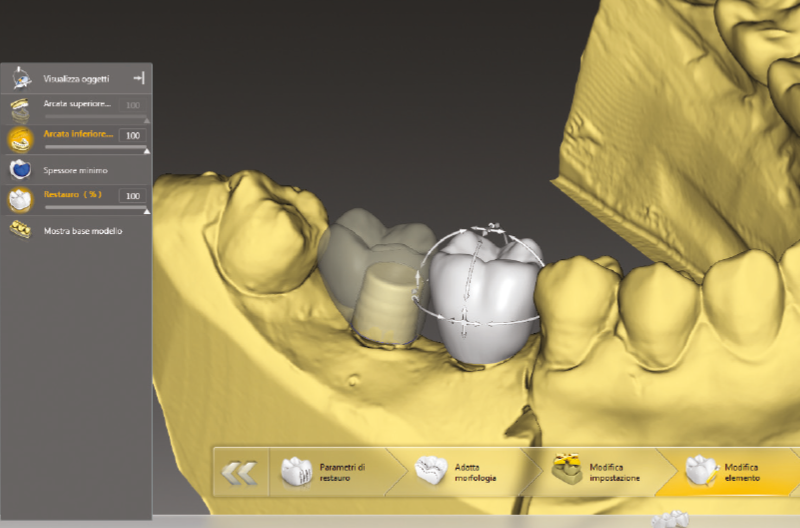
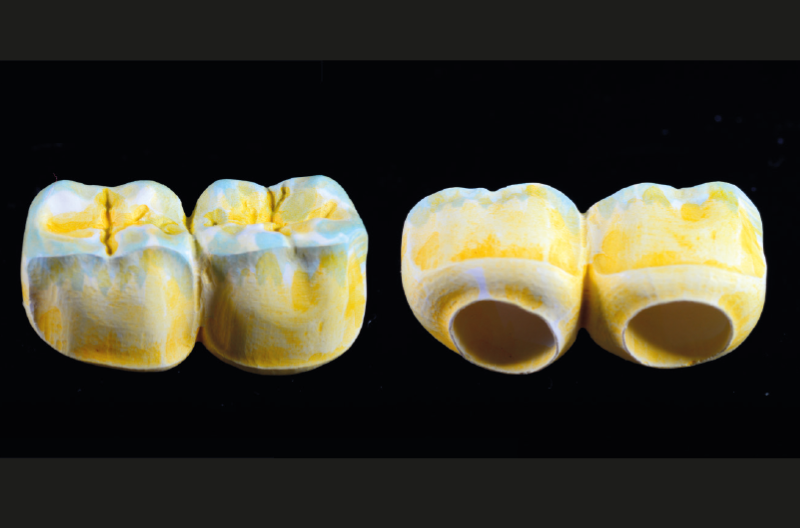
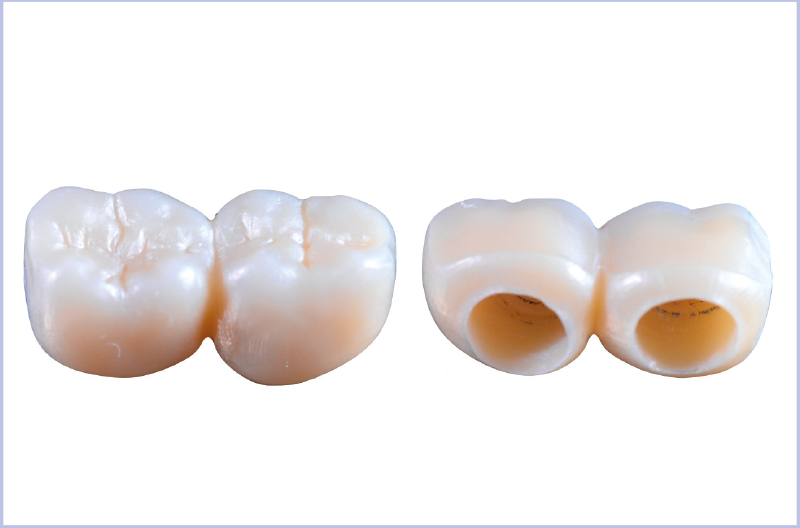
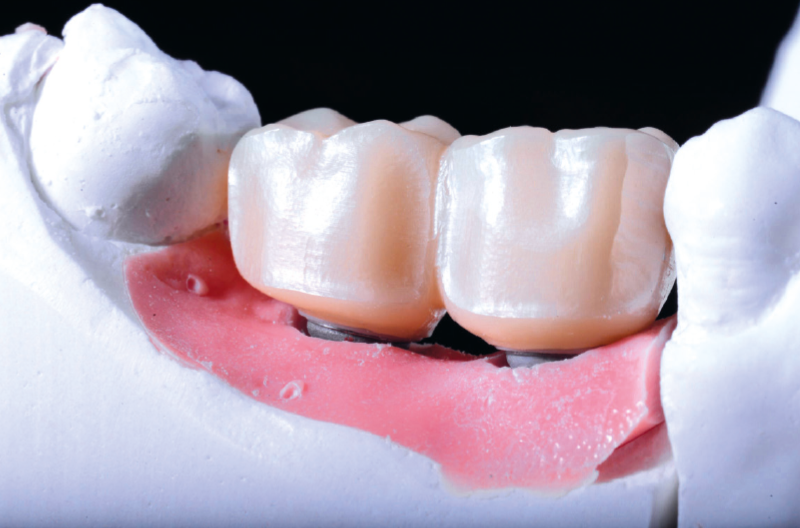
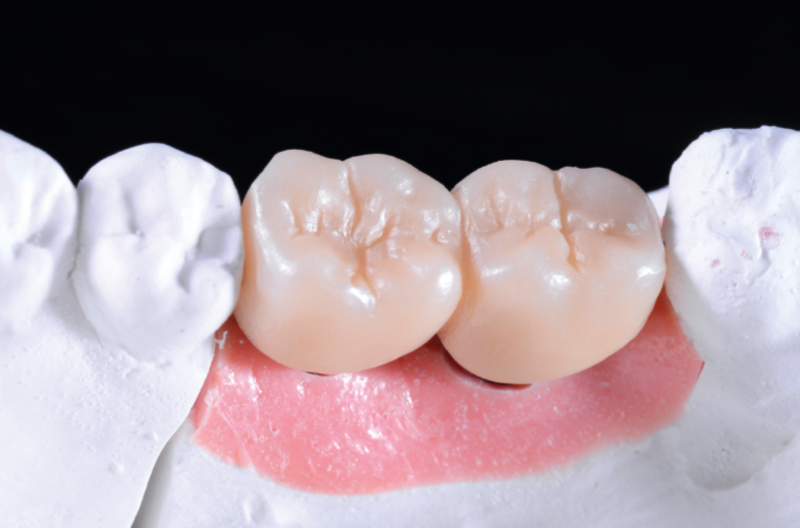
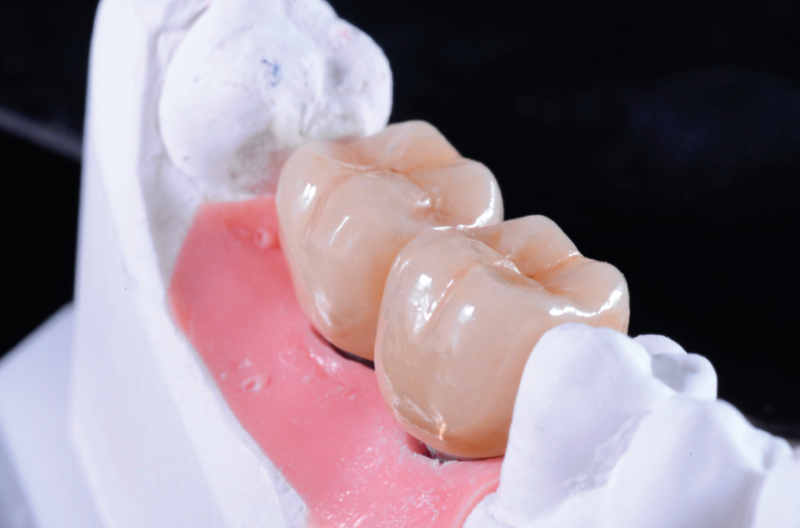
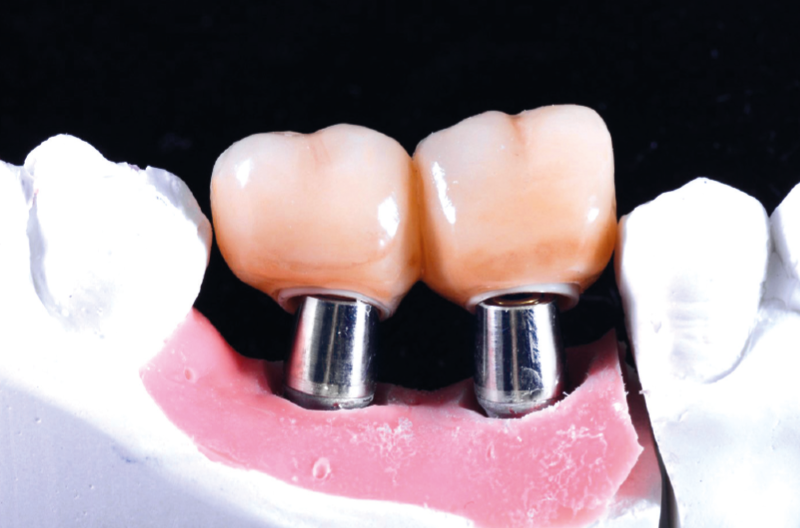
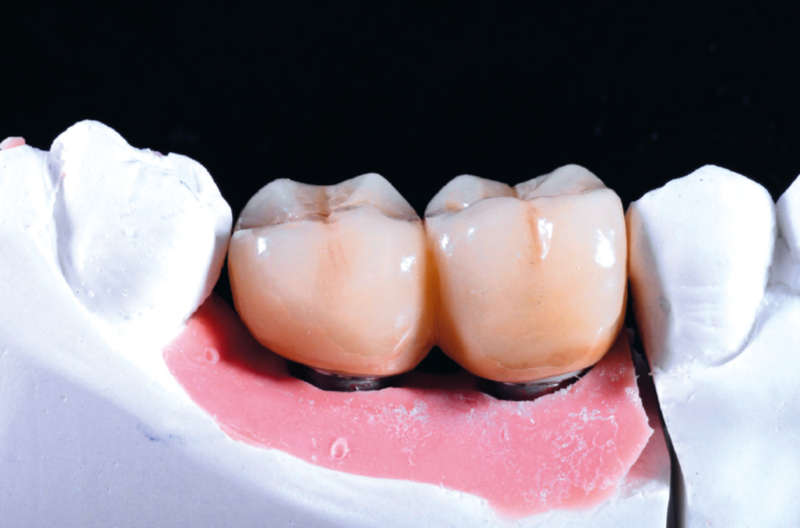
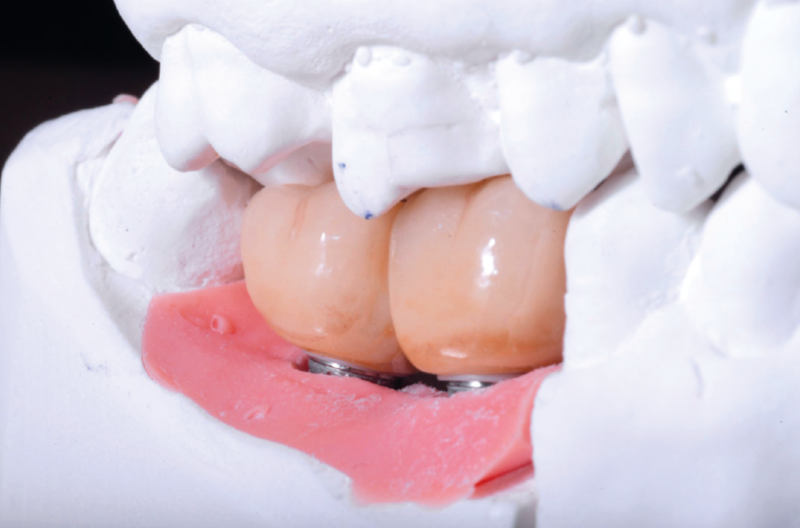
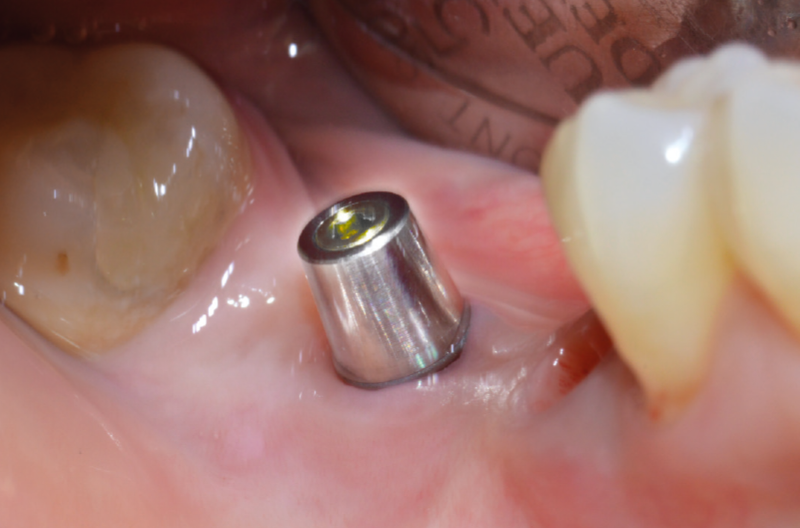
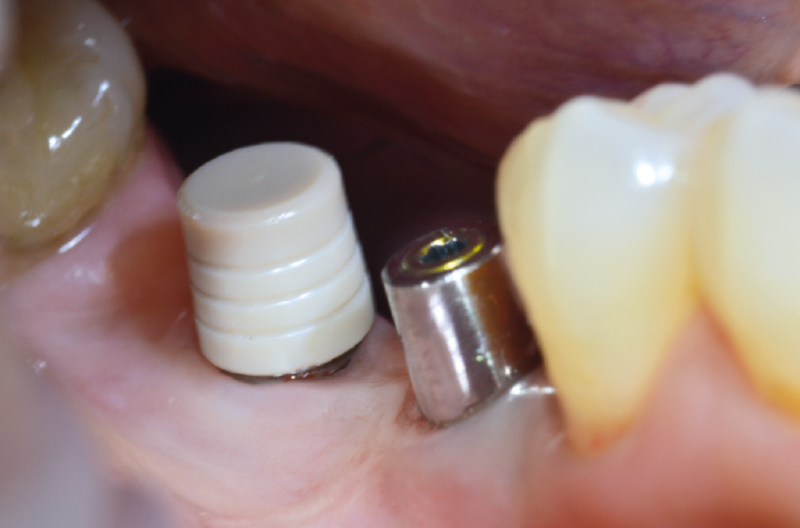
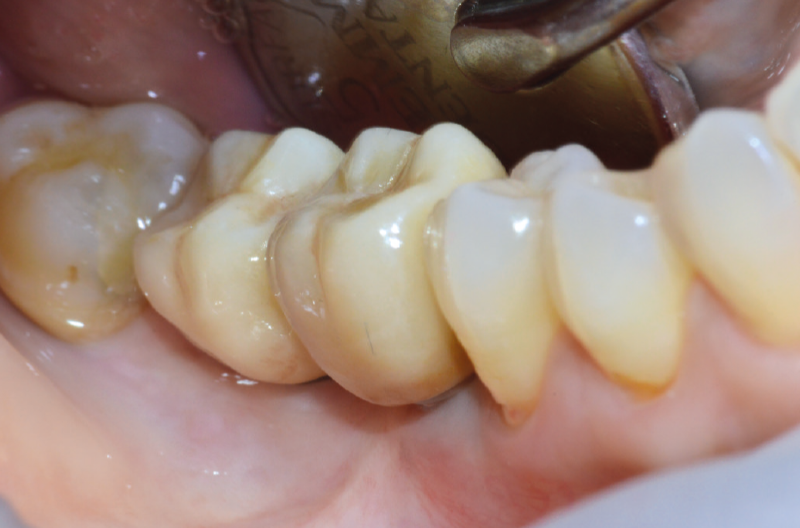
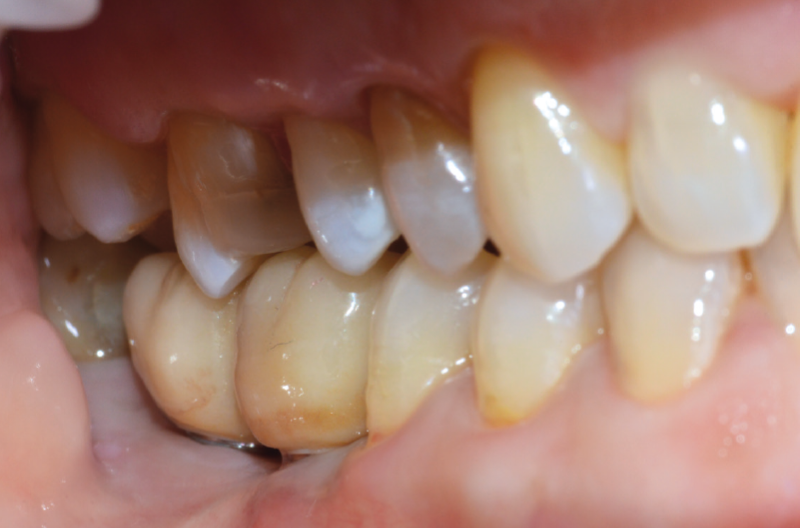
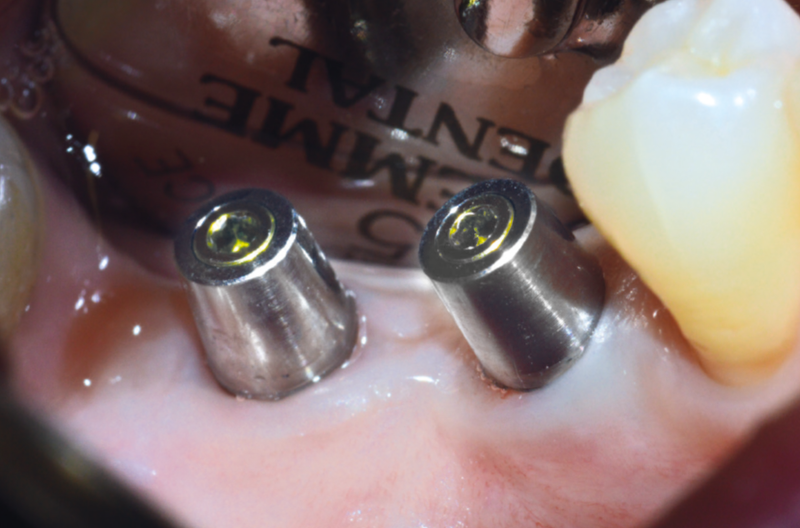
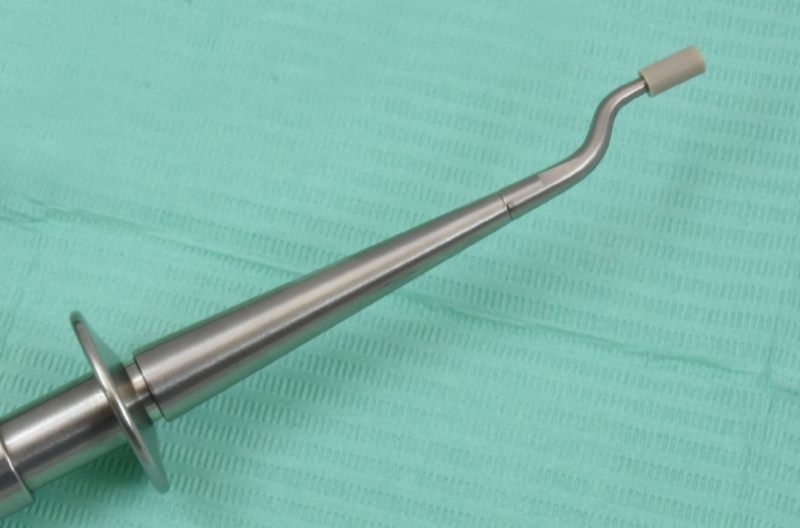
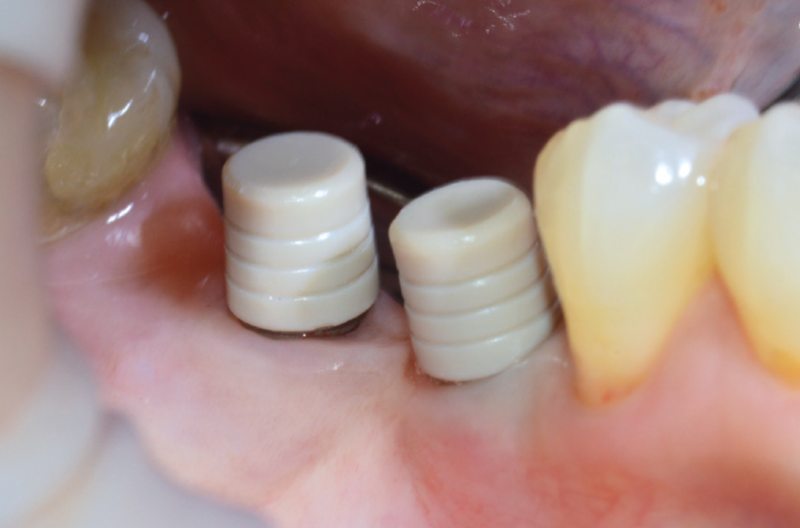
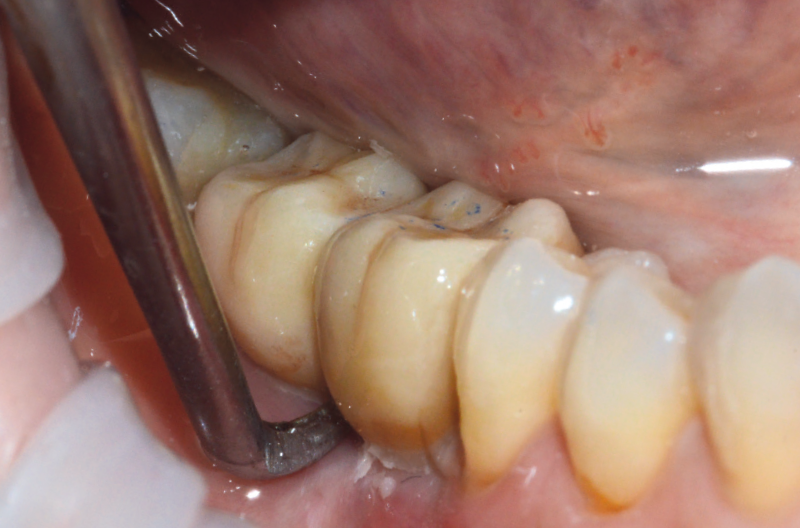
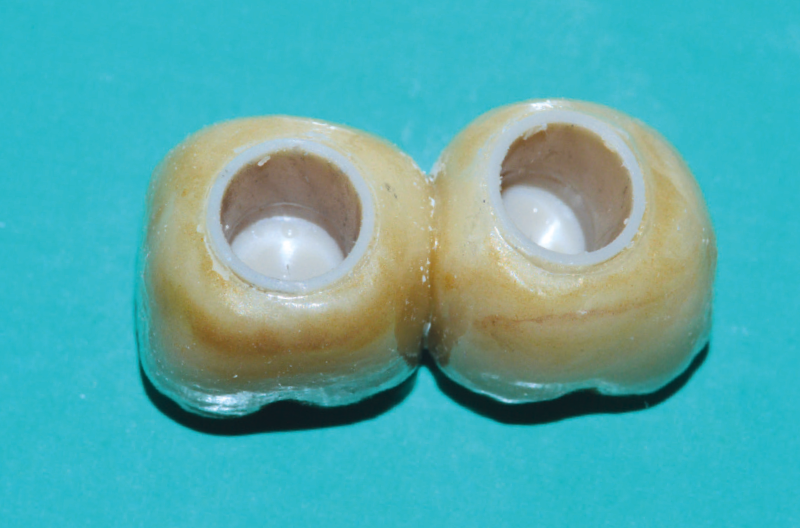
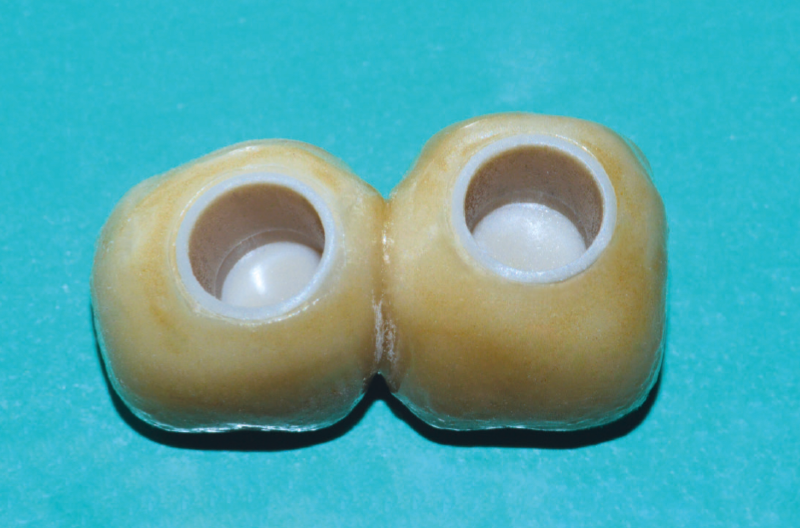
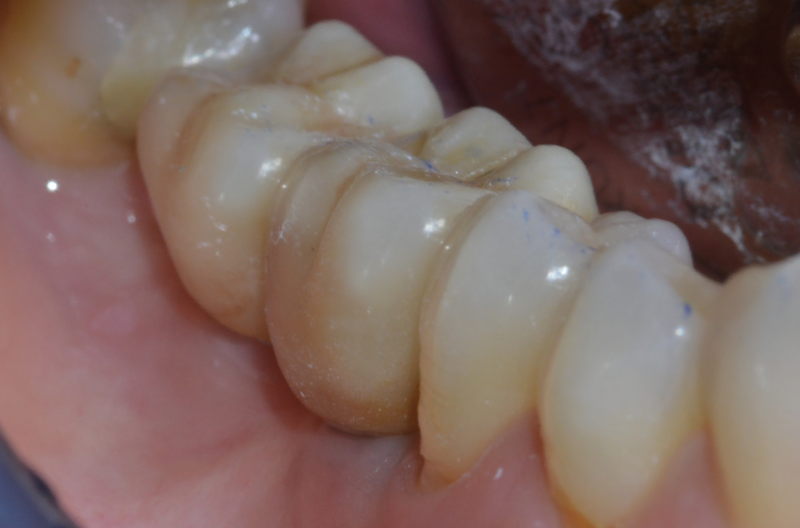
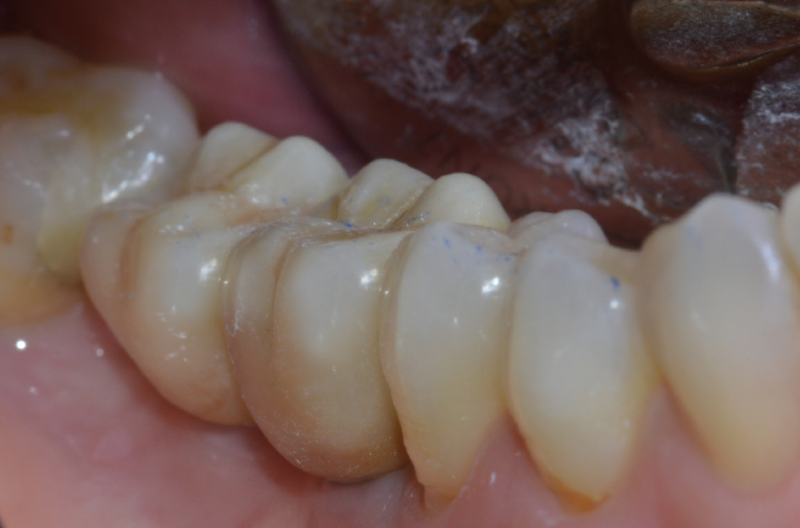
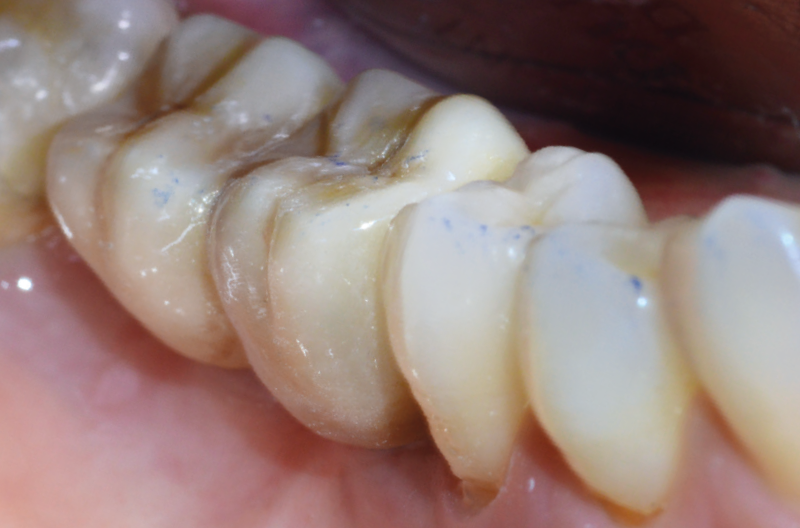
Ø 4.1 mm Classix implants with GH 5 mm Standard healing caps Implant Level impression was taken with yellow GH 5 Standard transfers Dental cast after implant-level impression: two GH 1.5 mm straight MUAs were selected and properly tapped into the analogs Conic adapter used to convert MUA into conometric abutment (MUA-Conic) Conic adapters screwed onto MUAs to convert into MUA-Conics Conic adapters tightened by means of the lab torque screwdriver Evaluation of the spaces with the antagonist Fixed caps placed with decisive manual pressure on MUA-Conics Fixed caps placed with decisive manual pressure on MUA-Conics Scanning process CAD project of the prosthesis; space of at least 120 microns for cementation to ensure a good passivity CAD project of the prosthesis; space of at least 120 microns for cementation to ensure a good passivity Bridge made of pre-coloured zirconia HT before sintering Sintered zirconia bridge Try-in of the bridge on the dental cast Try-in of the bridge on the dental cast Finished bridge with ceramic on outside facing and monolithic occlusal colouring Finished bridge with ceramic on outside facing and monolithic occlusal colouring Finished bridge with ceramic on outside facing and monolithic occlusal colouring Finished bridge with ceramic on outside facing and monolithic occlusal colouring; Note: Fixed caps are not yet cemented within the bridge, the dentist will do it intraorally View of clinical situation after removal of healing caps Try-in of MUA-Conics, Fixed caps and conometric bridge without activating the connections Try-in of MUA-Conics, Fixed caps and conometric bridge without activating the connections Try-in of MUA-Conics, Fixed caps and conometric bridge without activating the connections Try-in of MUA-Conics, Fixed caps and conometric bridge without activating the connections MUA-Conics properly tapped into the implants Abutment seater with offset PEEK tip used to tap the abutments into the implant and to seat the Fixed caps with a gentle tapping force on the abutments Fixed conometric caps properly tapped onto MUA-Conics The bridge was cemented with Multilink Hybrid Abutment on the Fixed caps. In order to remove the conometric bridge, with the PEEK tip a gentle tapping force is applied laterally on the bridge and a crown remover was used Conometric bridge after removal: note cement residues Conometric bridge finished and polished Bridge replaced in the mouth: the patient was asked to bite down on a cotton roll in order to reactive the conometric retention Control of contact points with articulating paper Control of contact points with articulating paper


Laboratory:
Massimiliano Pisa, Dental Giglio – Florence, Italy