Surgeon/Restorative dentist:
Dr. Renato Turrini – Massarosa (Lucca), Italy
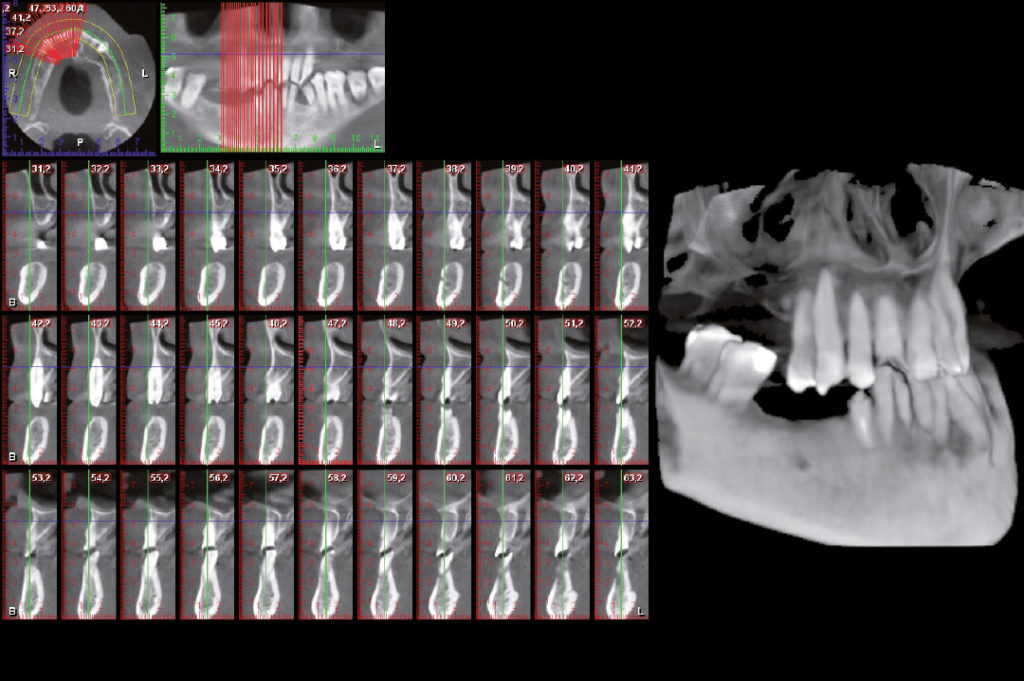
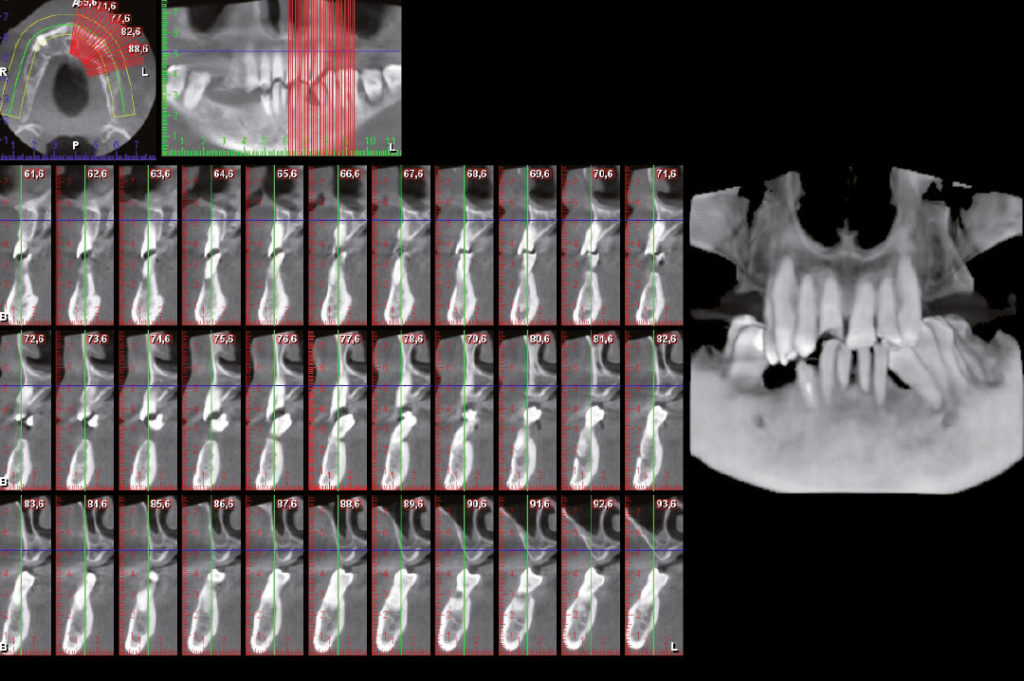
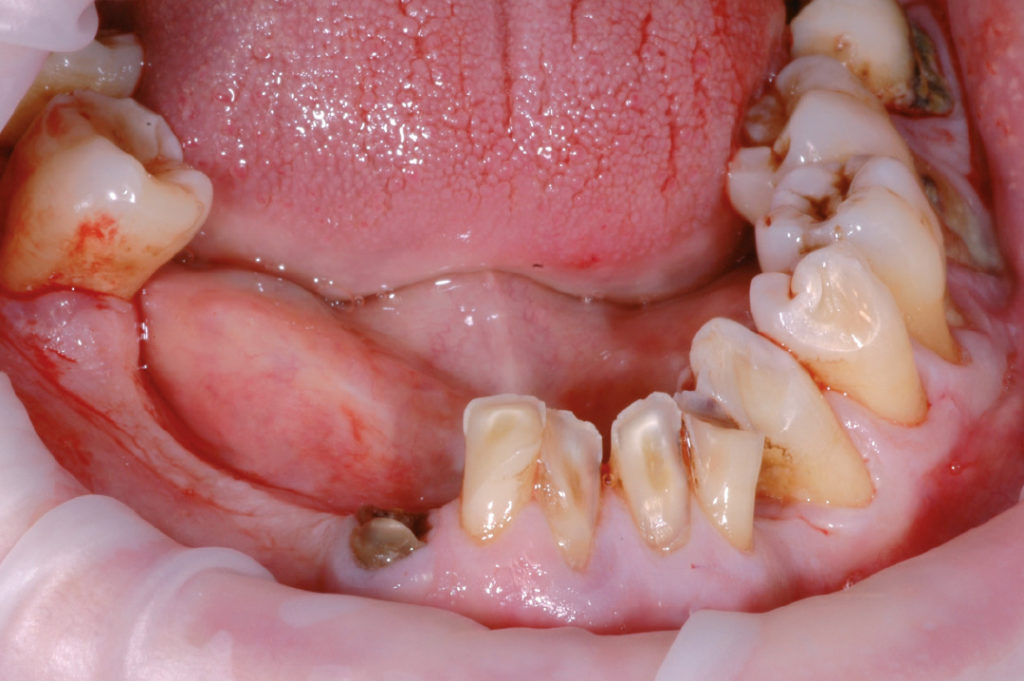
This case report shows the immediate loading of four XCN implants in the lower jaw with a screw-retained prosthesis. The 63-year-old male patient, with a hopeless dentition in the lower jaw due to several loose teeth, abscesses and compromised masticatory function, asked for a fixed restoration without a removable provisional phase. Clinical and radiographic examinations were performed and treatment options were discussed with the patient. In agreement with the patient, it was decided to extract the remaining teeth and to place two axial anterior implants (3,75 x 12mm) and two tilted posterior implants (4,5 x 14 mm) for an optimized load distribution. Right after surgery abutments were chosen and definitely seated into the implants. An abutment level impression was taken and a conventional cast bar was fabricated. The next day, in the morning, an aesthetic try-in with resin prototype teeth was performed; in the afternoon the definitive prosthesis with metal structure was screwed onto the abutments. After four months of healing, the prosthesis was unscrewed, rebasing was performed with acrylic resin and the definitive prosthesis was delivered to the patient.
Fabrication of screw-retained prosthesis with the Leone implant system is easier and safer than with other implant systems because there is only one screw to deal with (the prosthetic screw that fixes the structure to the abutments) and not two, as the connection between abutment and implant is realized with a screwless Morse taper connection. This makes procedures faster and simpler, a big advantage especially in case of immediate loading. In addition, the prosthetic screw has a diameter of 2 mm, the biggest on the market, preventing mechanical complications such as screw fractures or loosening.

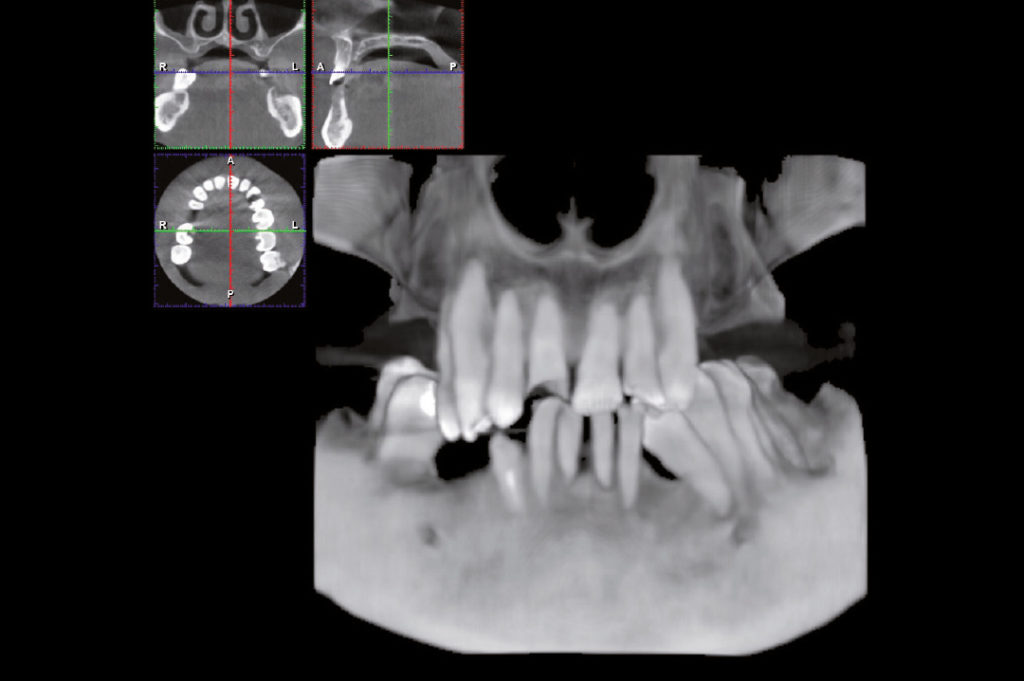
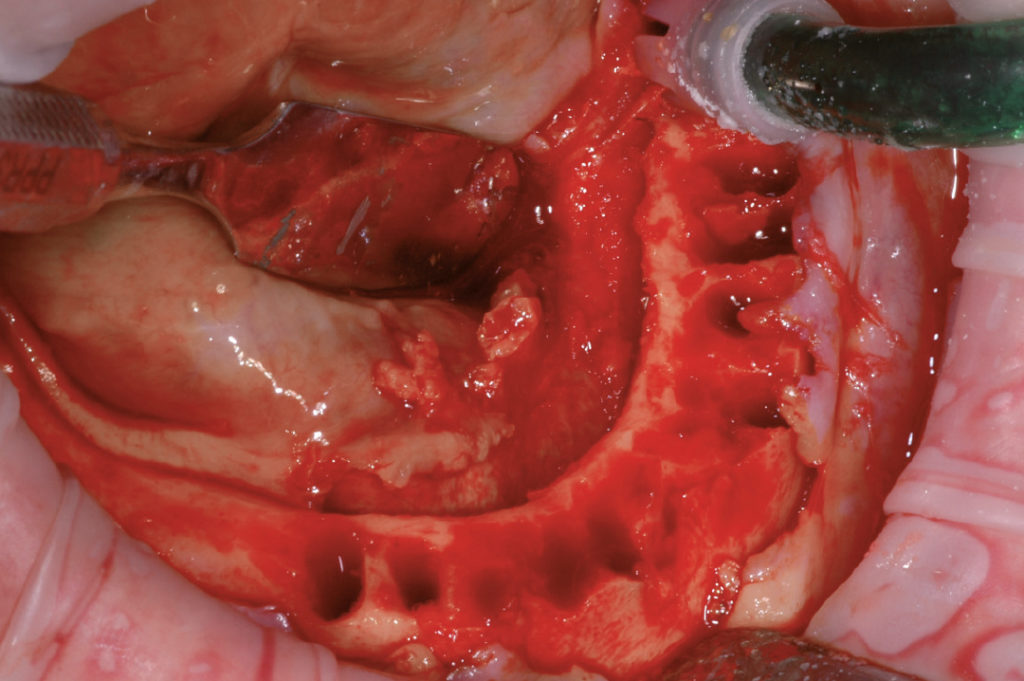
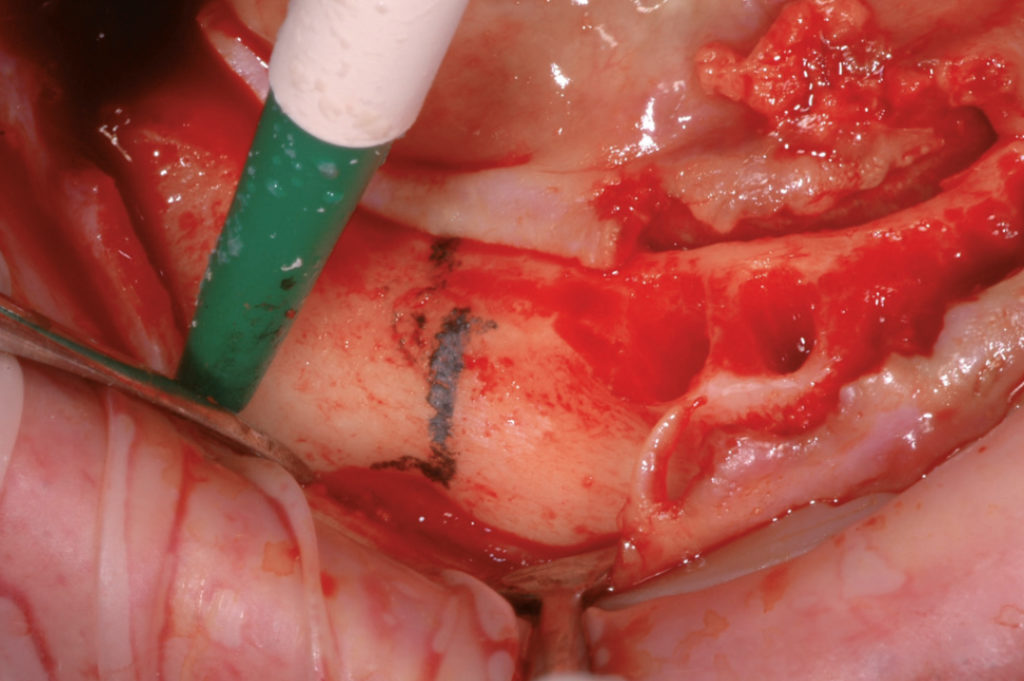
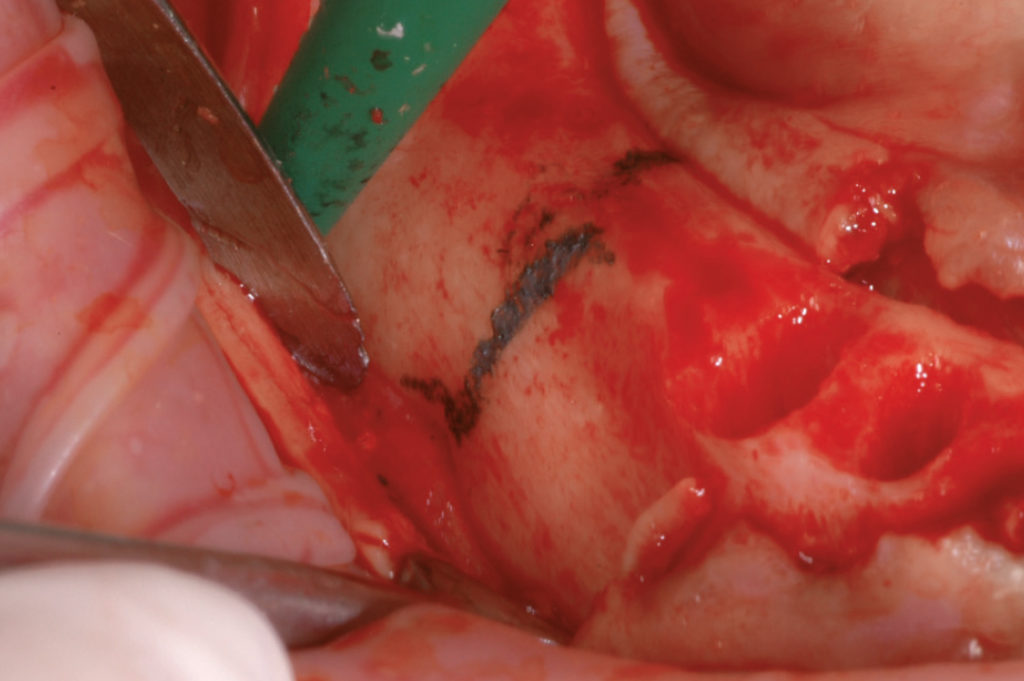
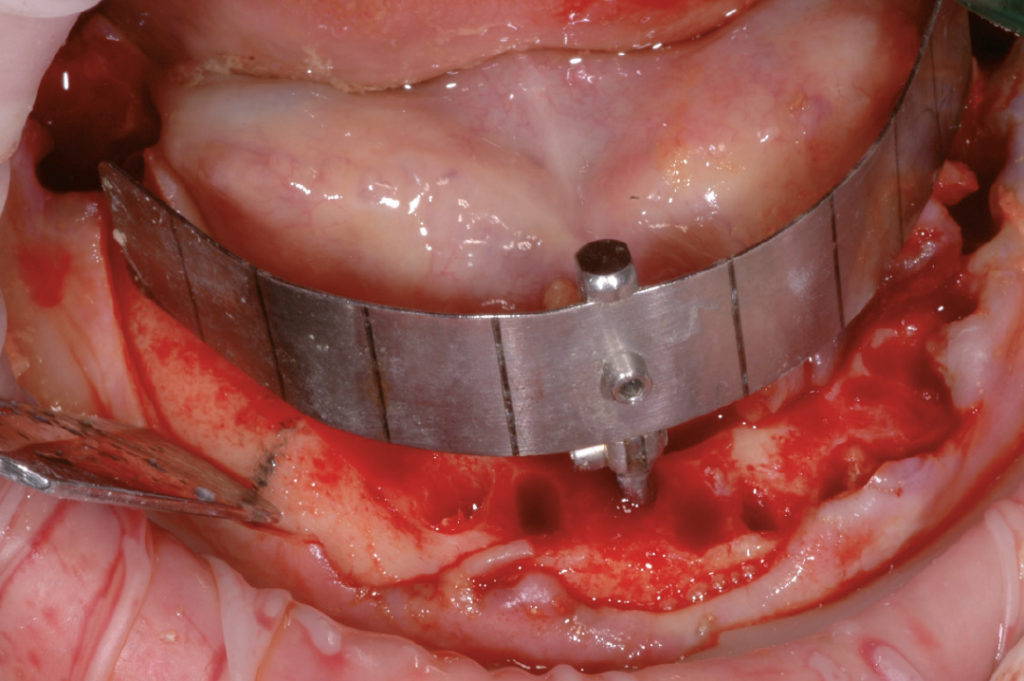
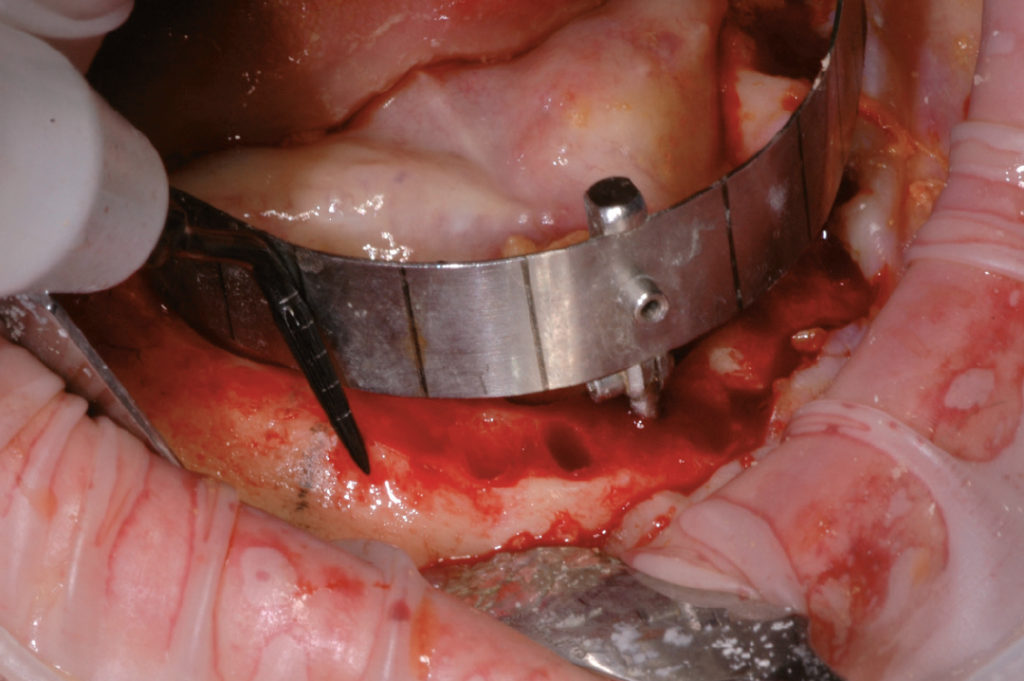
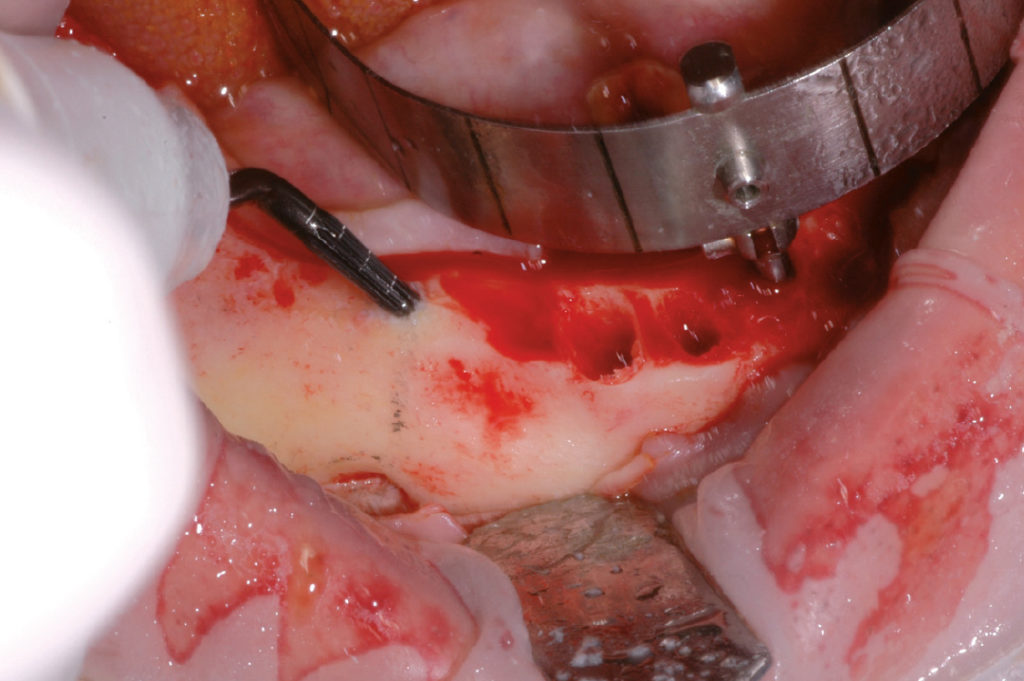
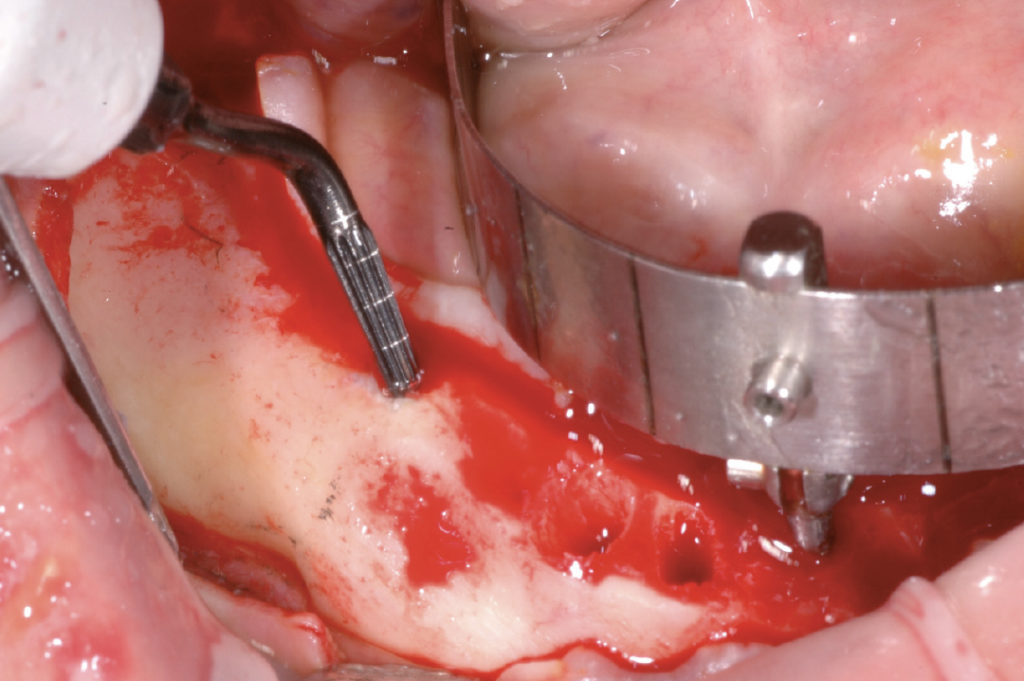
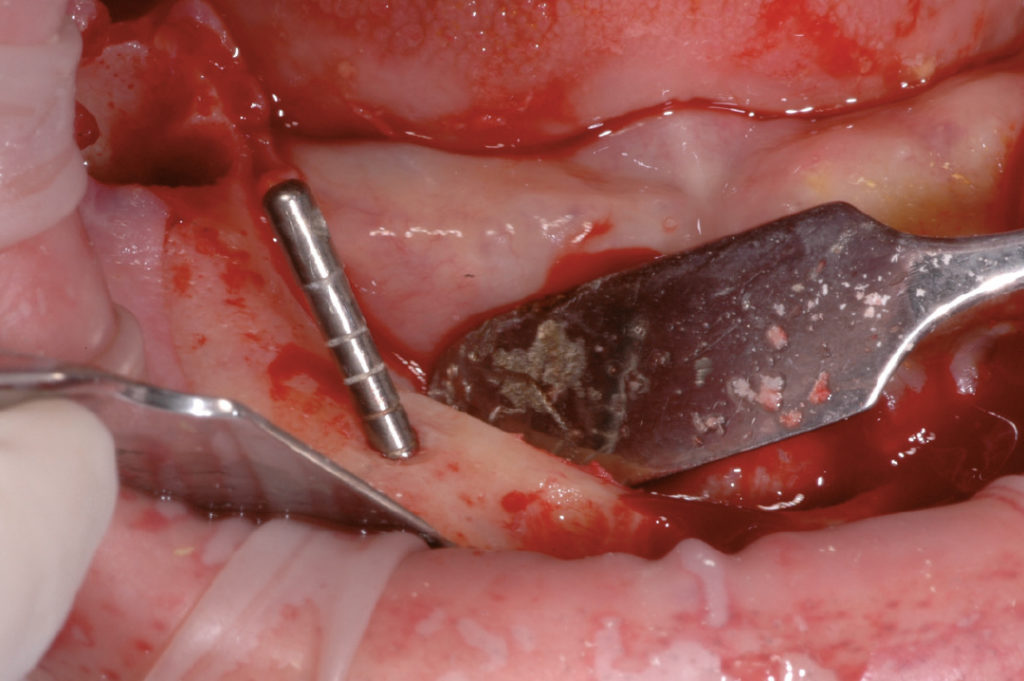
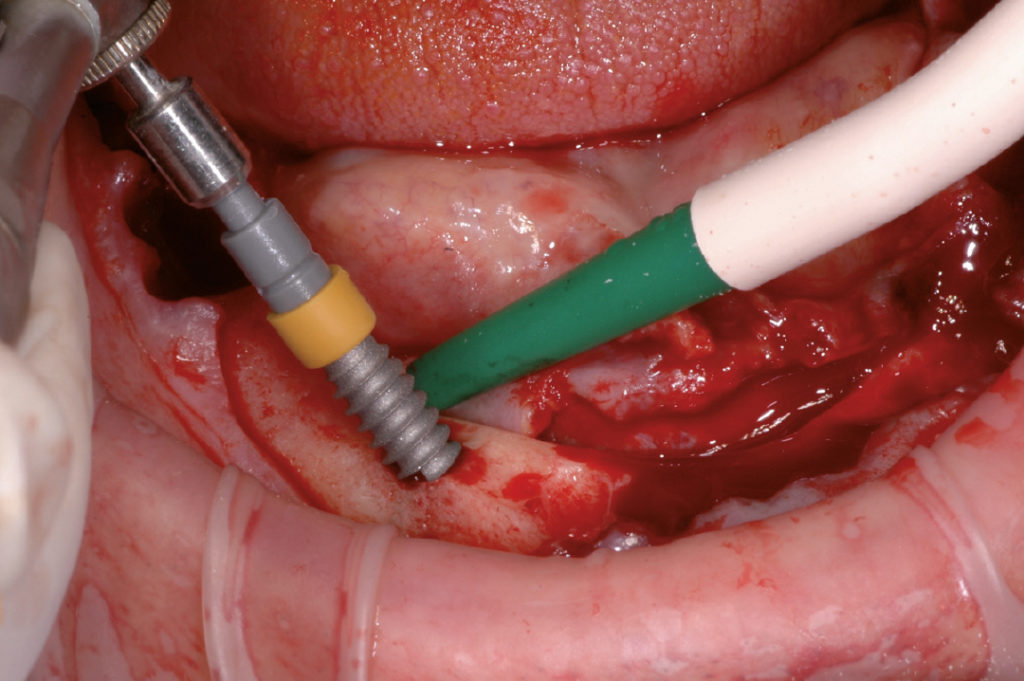
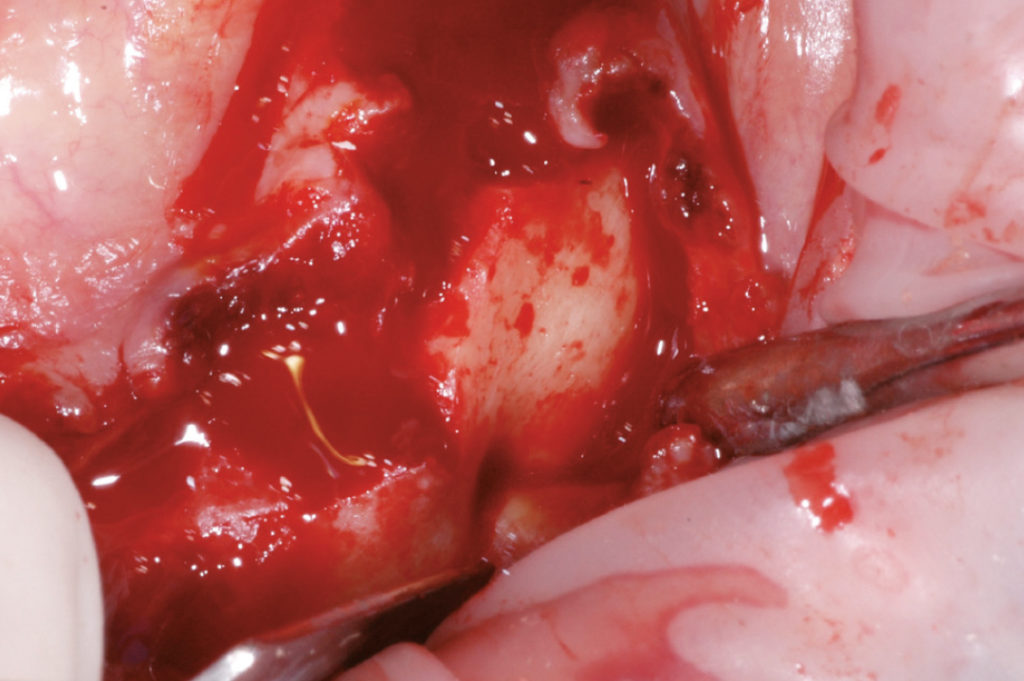
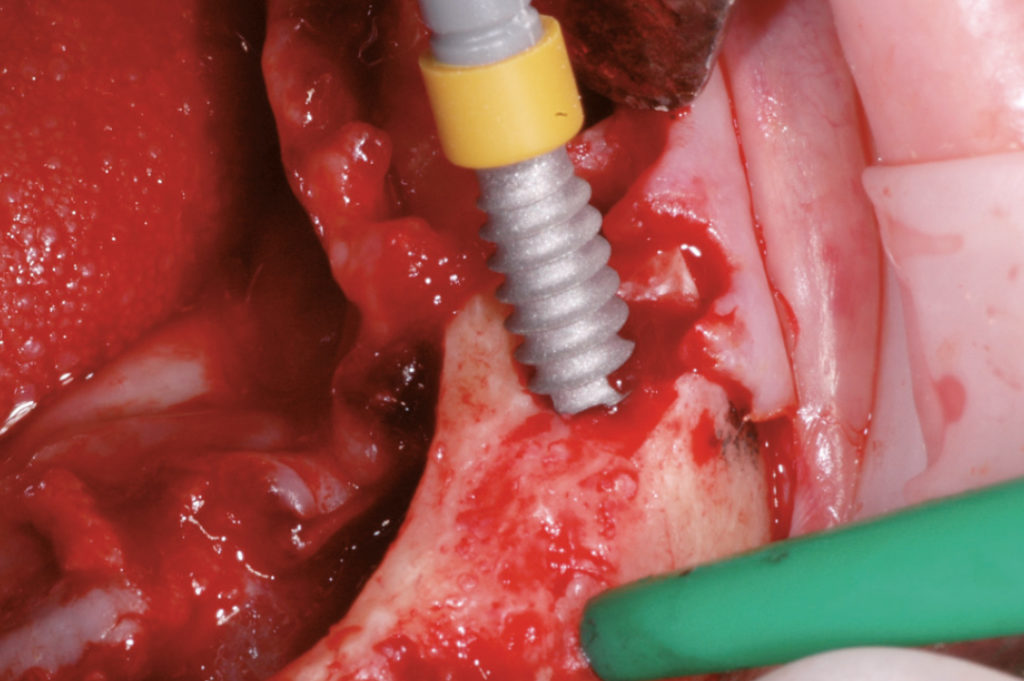
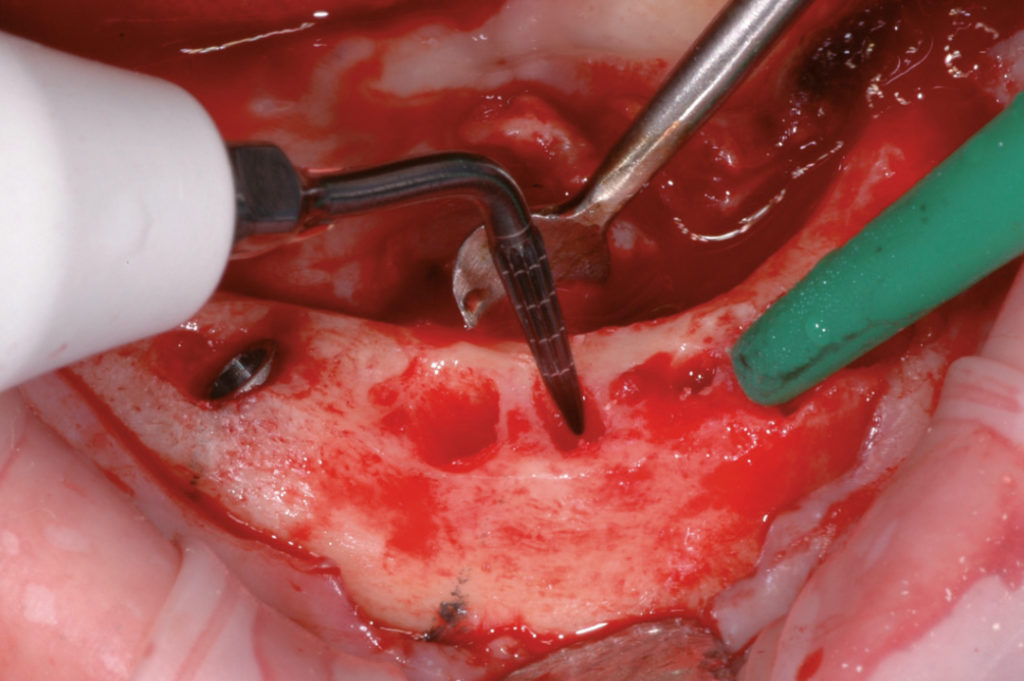
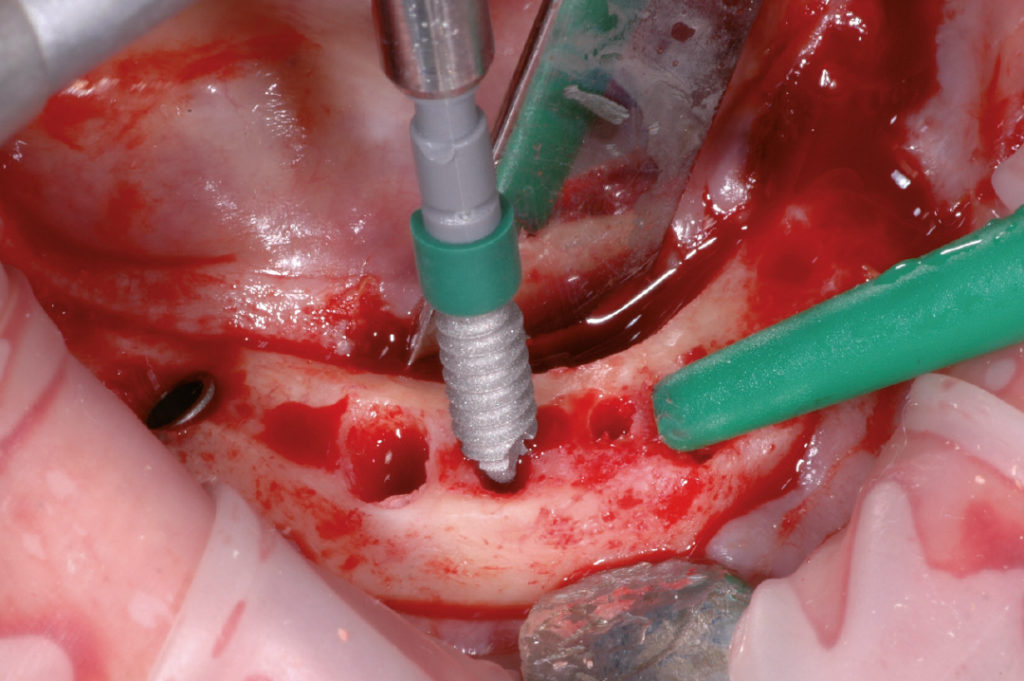
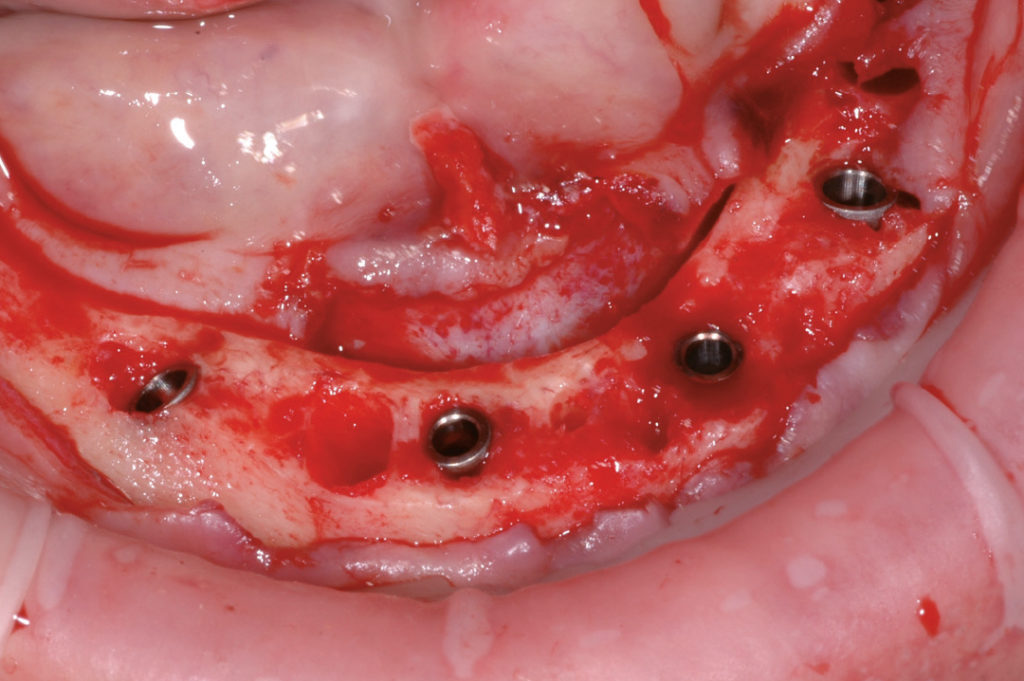
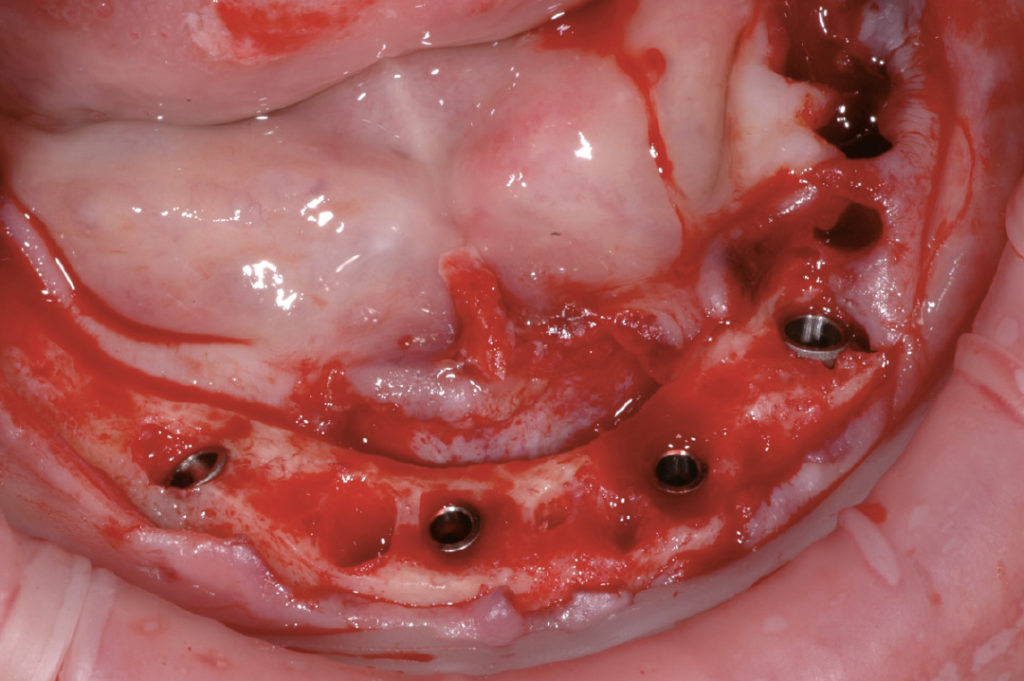
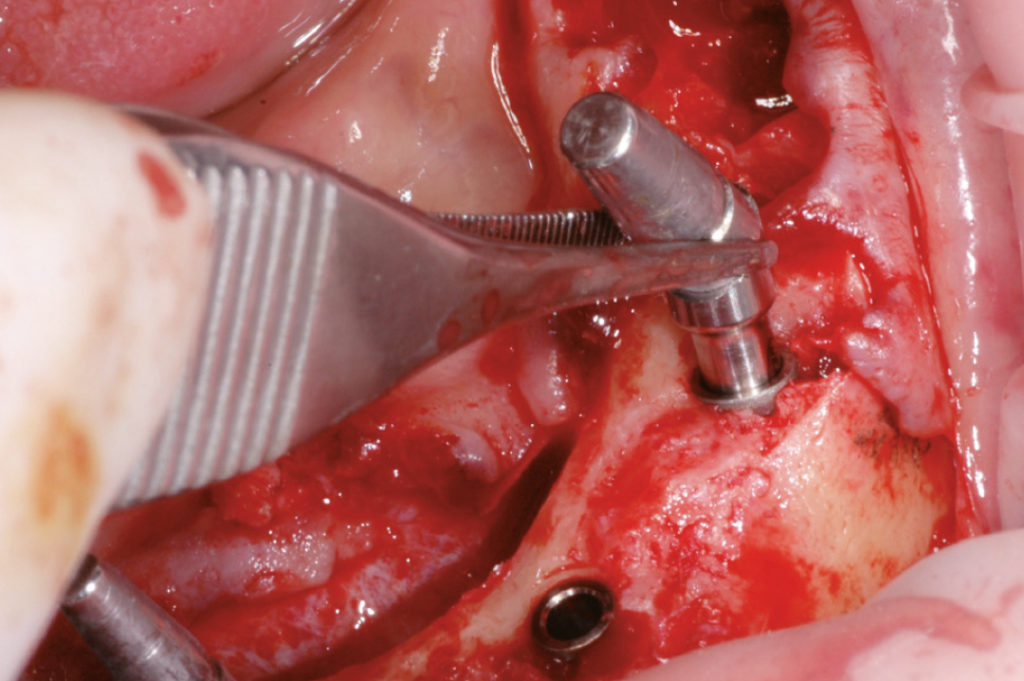
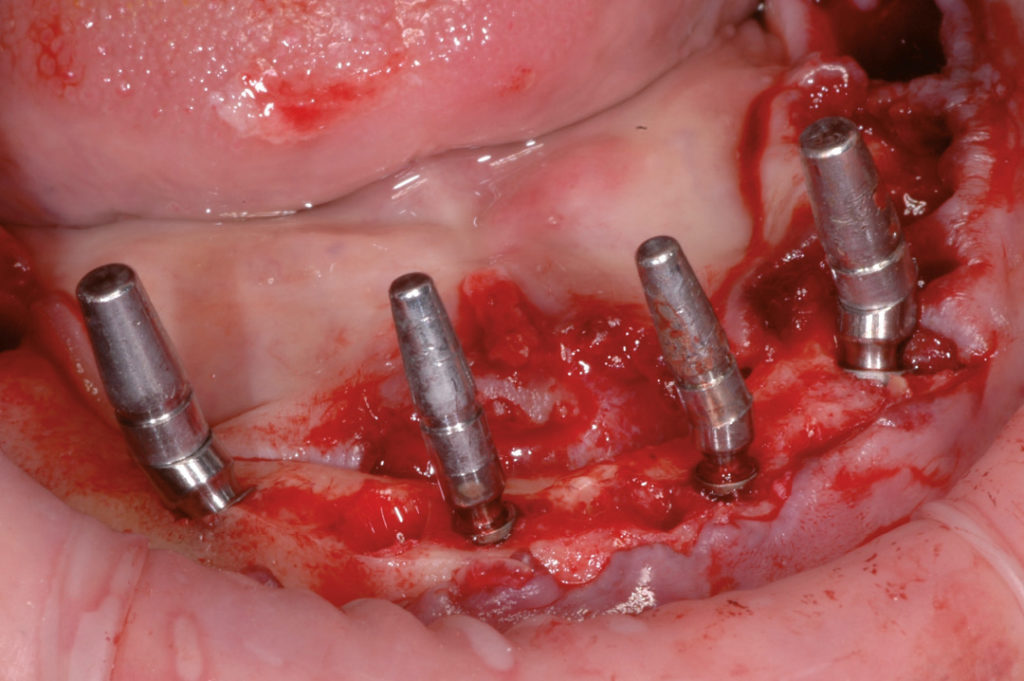
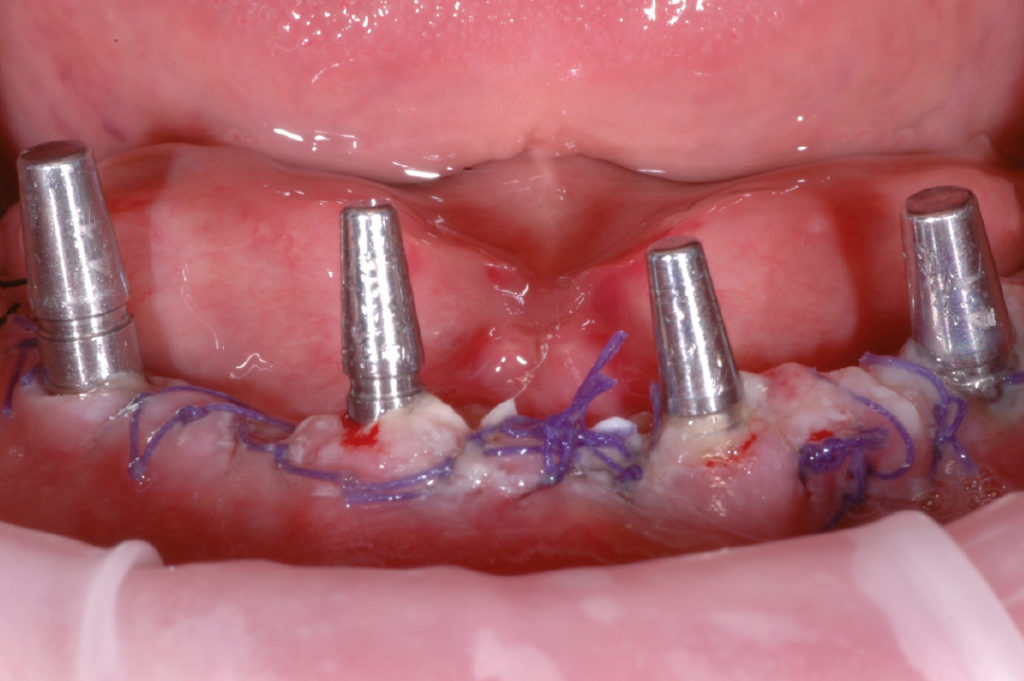
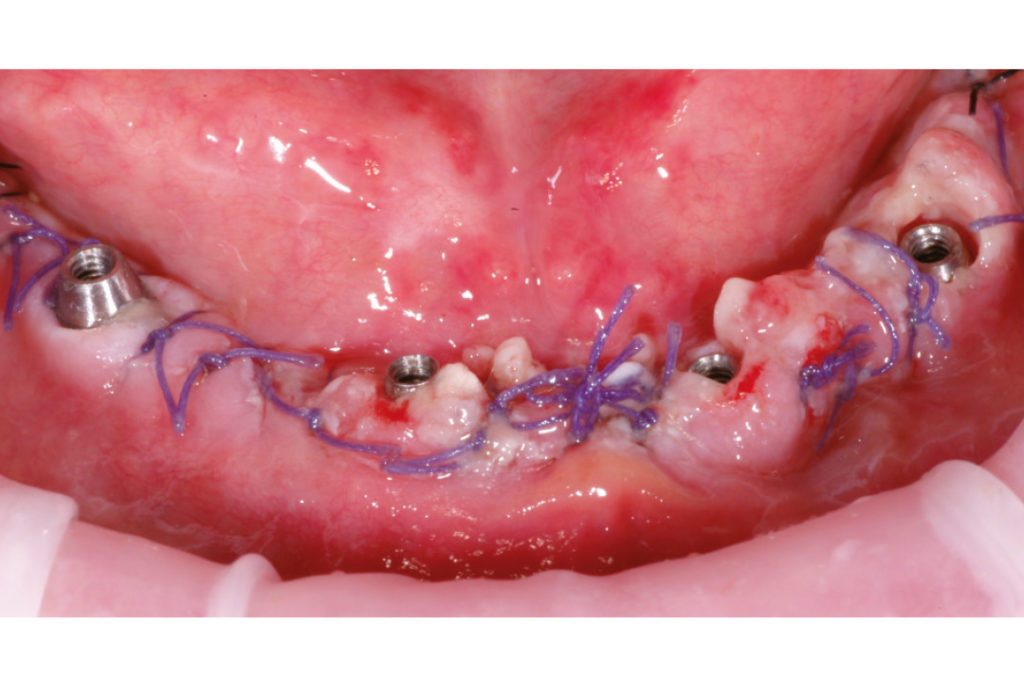
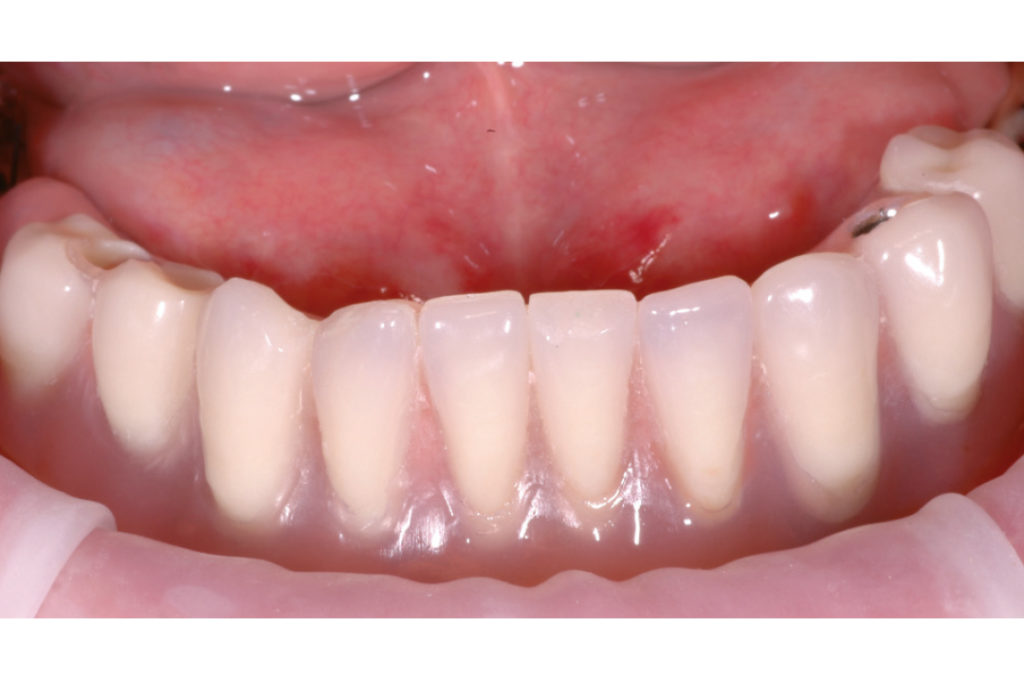
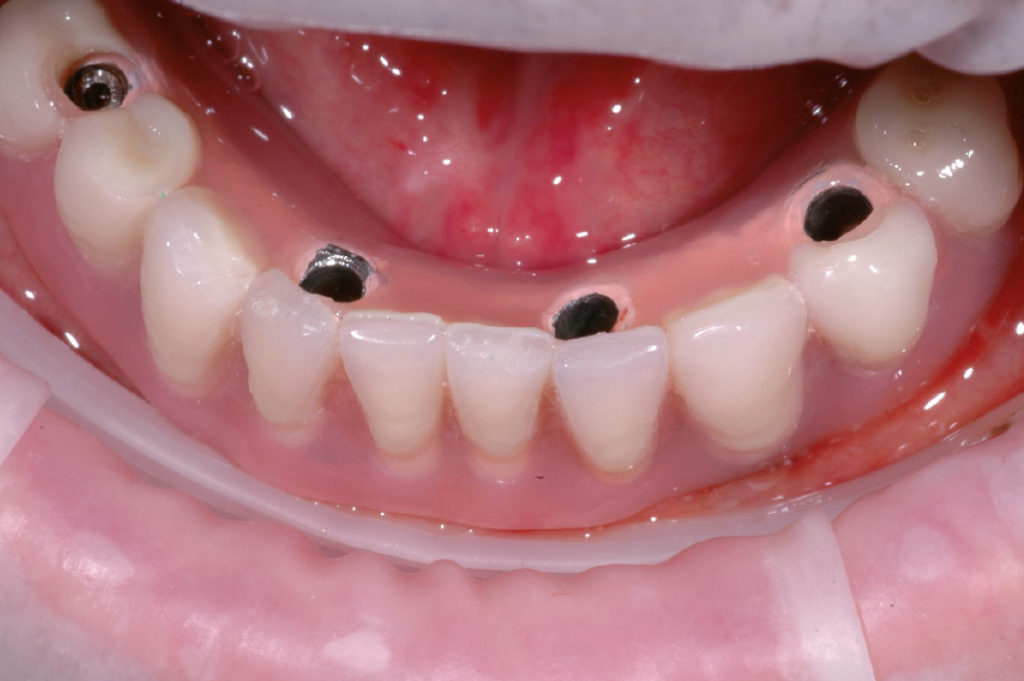
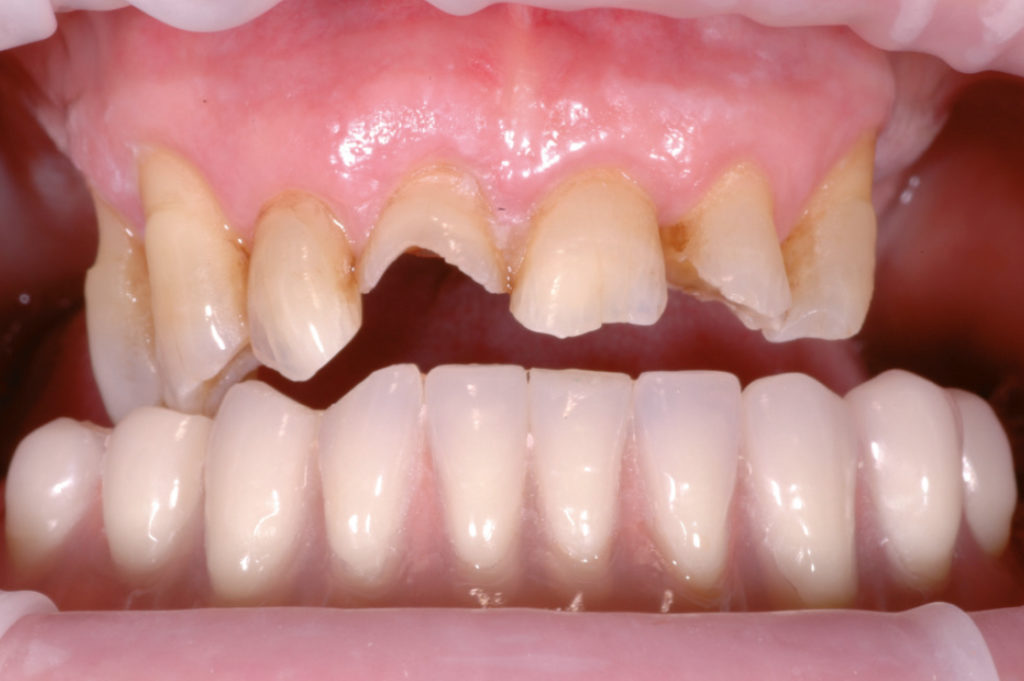
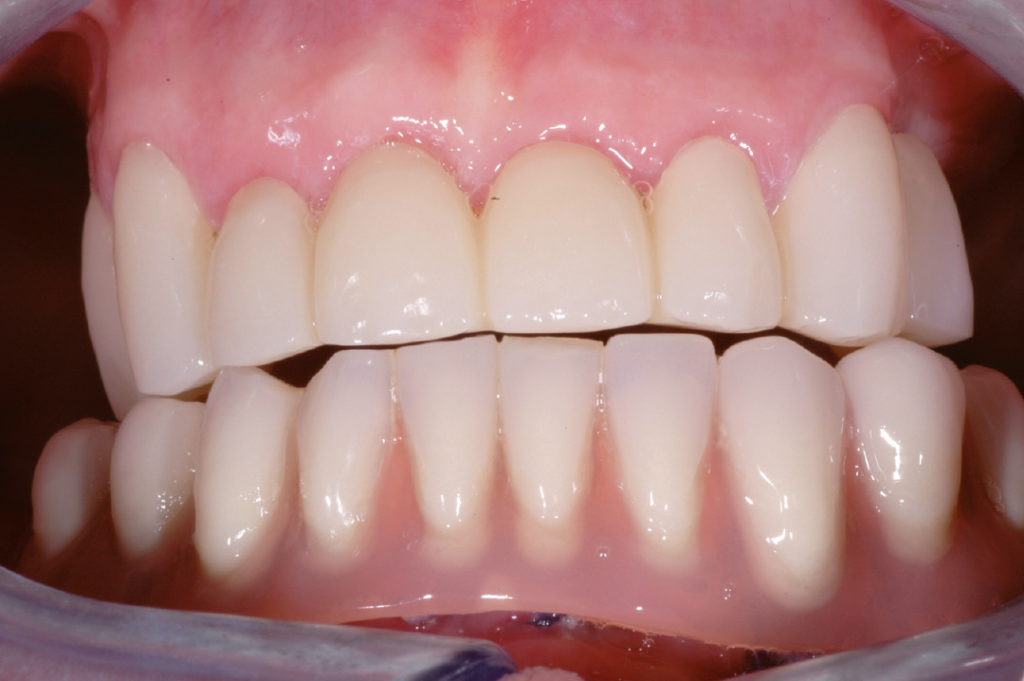
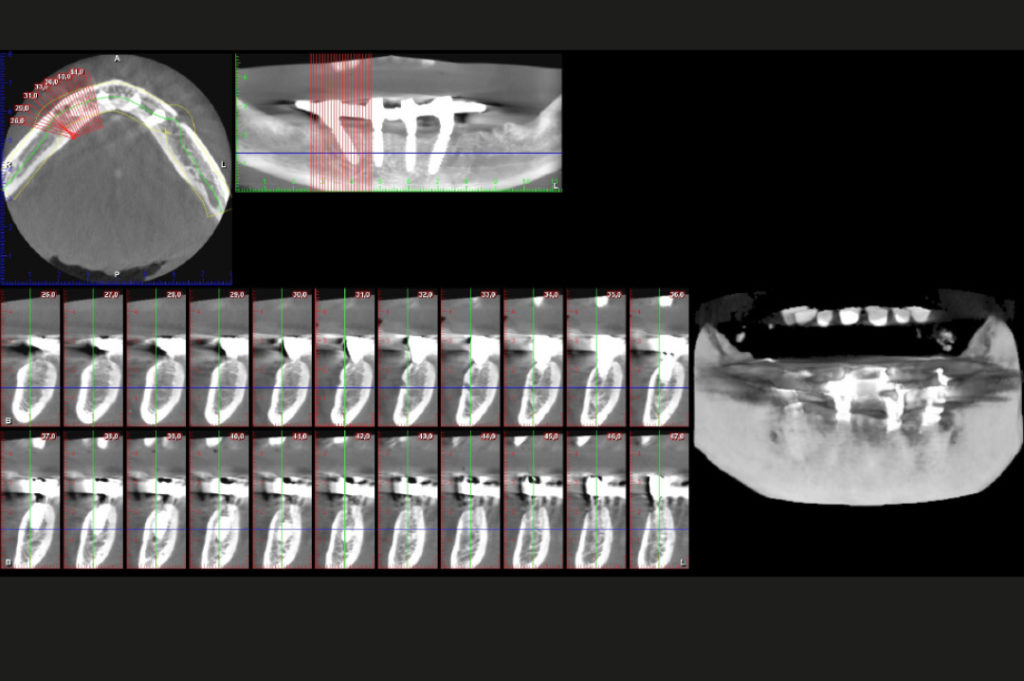
CBCT cross section images right quadrant CBCT cross section images left quadrant 3D reconstruction Pre-operative clinical view before teeth extractions Clinical view after extraction of all remaining teeth, full-thickness mucoperiosteal flap, surgical debridement, cleaning and flattening of the residual ridge Clinical view after extraction of all remaining teeth, full-thickness mucoperiosteal flap, surgical debridement, cleaning and flattening of the residual ridge Identification of the mental foramen; the location of the mental foramen is marked with a surgical pen Identification of the mental foramen; the location of the mental foramen is marked with a surgical pen All-on-four surgical guide in place; an osteotomy has been made in the midline to fix the guide Use of piezosurgery tip for initial pilot osteotomy in position #44 – #45; the All-on-four guide helps to determine the correct inclination for the posterior tilted implants Use of piezosurgery tip for initial pilot osteotomy Use of piezosurgery tip for initial pilot osteotomy Use of pilot drill with stop Check of the depth of the created osteotomy; use of twist drills with stop to finalyze the osteotomy Insertion of a 4,5 x 14 mm XCN Max Stability implant Preparation of the osteotomy in position #34 – #35 using the same technique described in figures 10 to 14 Insertion of a 4,5 x 14 mm XCN Max Stability implant Preparation of osteotomies for axially oriented implants in the anterior region using the same technique: piezosurgery tips, pilot drill and twist drills with depth stop Insertion of a 3,75 x 12 mm XCN Max Stability implant in position #42 Implants in place Implants in place Transfers are screwed onto the selected MUAs and abutments are placed into the implants: two 35° angled GH 3 mm abutments for the tilted implants, one straight and one 15° angled GH 3 mm abutment for the anterior implants MUAs are rotated until parallelism is achieved Once correct positions are determined, transfers are removed and abutments are tapped into the implants Transfers placed back onto the MUAs; wound closure with resorbable sutures Wound closure with resorbable sutures for abutment level impression with silicone material Abutments in place before placement of healing screws onto the abutments; impression, transfers and abutment analogs are send to the lab Next day, in the afternoon, try-in of the final prosthesis Next day, in the afternoon, try-in of the final prosthesis Next day, in the afternoon, delivery of the final prosthesis Next day, in the afternoon, delivery of the final prosthesis CBCT exam after 4 months


Laboratory:
Ceragioli – Pietrasanta (Lucca), Italy